Long time, no posts!
Finally wrote up this little project from last year: Repurposing my SHA2017 hacker camp badge into a solar energy and power consumption monitor.
Background
Lately I've really appreciated systems that show passive information - learning something useful without needing to parse a flashy Dashboard or interact with a touch screen.
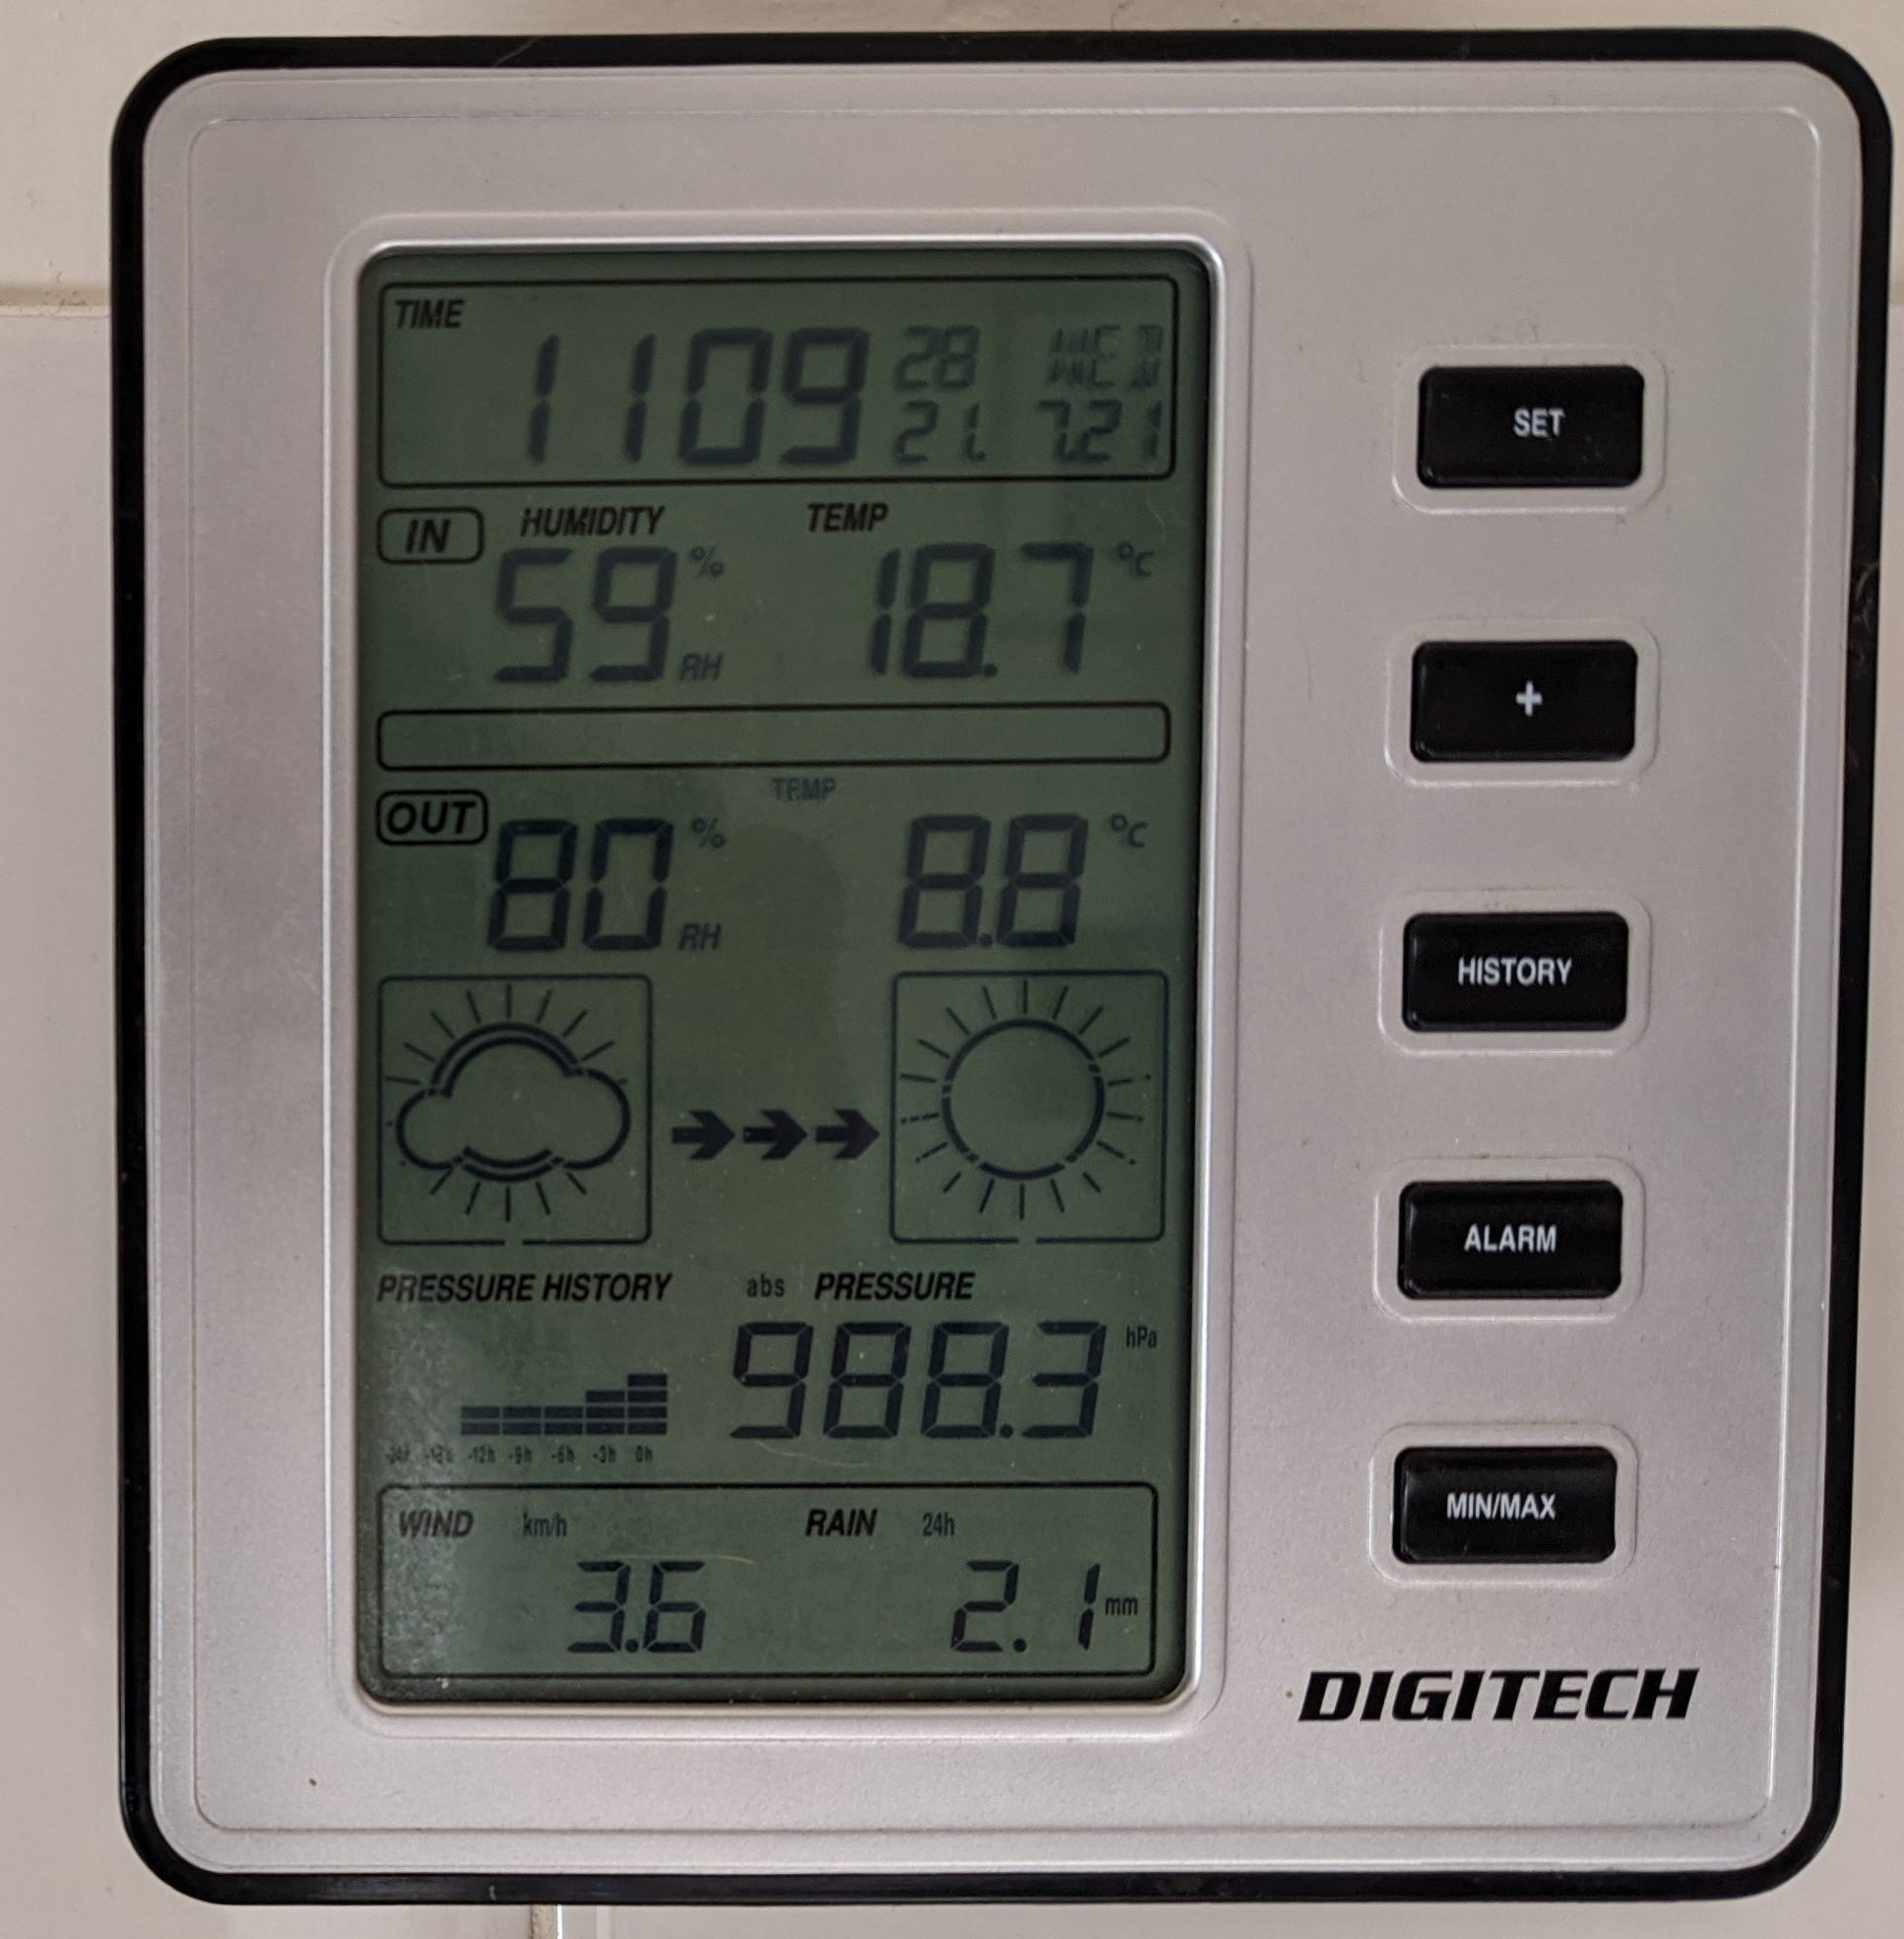
For example, I like our weather station. It might be ugly but it's always there in the kitchen, quietly showing you the temperature:
To experiment more with this kind of interface, I backed the Inkplate 10 programmable e-ink display on CrowdSupply last year.
In the meantime, I noticed this neat project from the Netherlands that repurposed the SHA2017 Hacker Camp badge as a CO2 sensor:
b
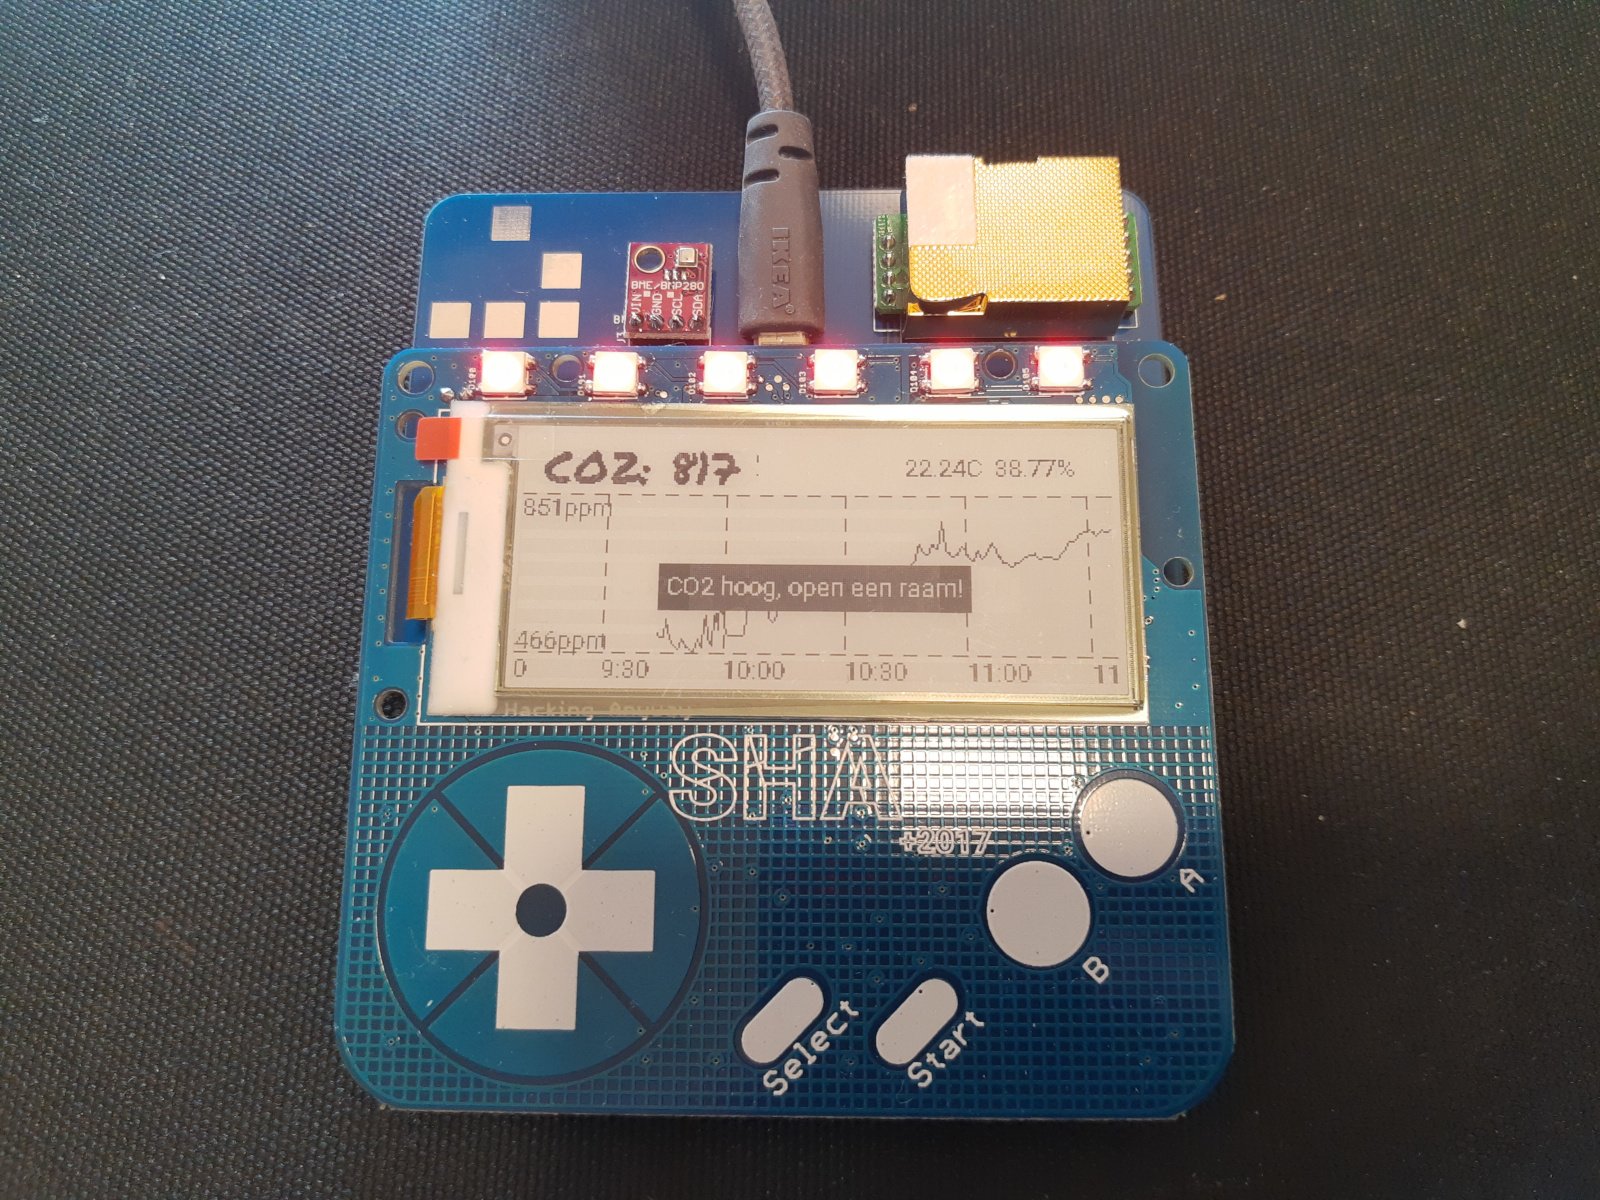
https://polyfloyd.net/post/co2-sensors-against-covid/
"Oh, I have one of those badges too!"
What was SHA2017?
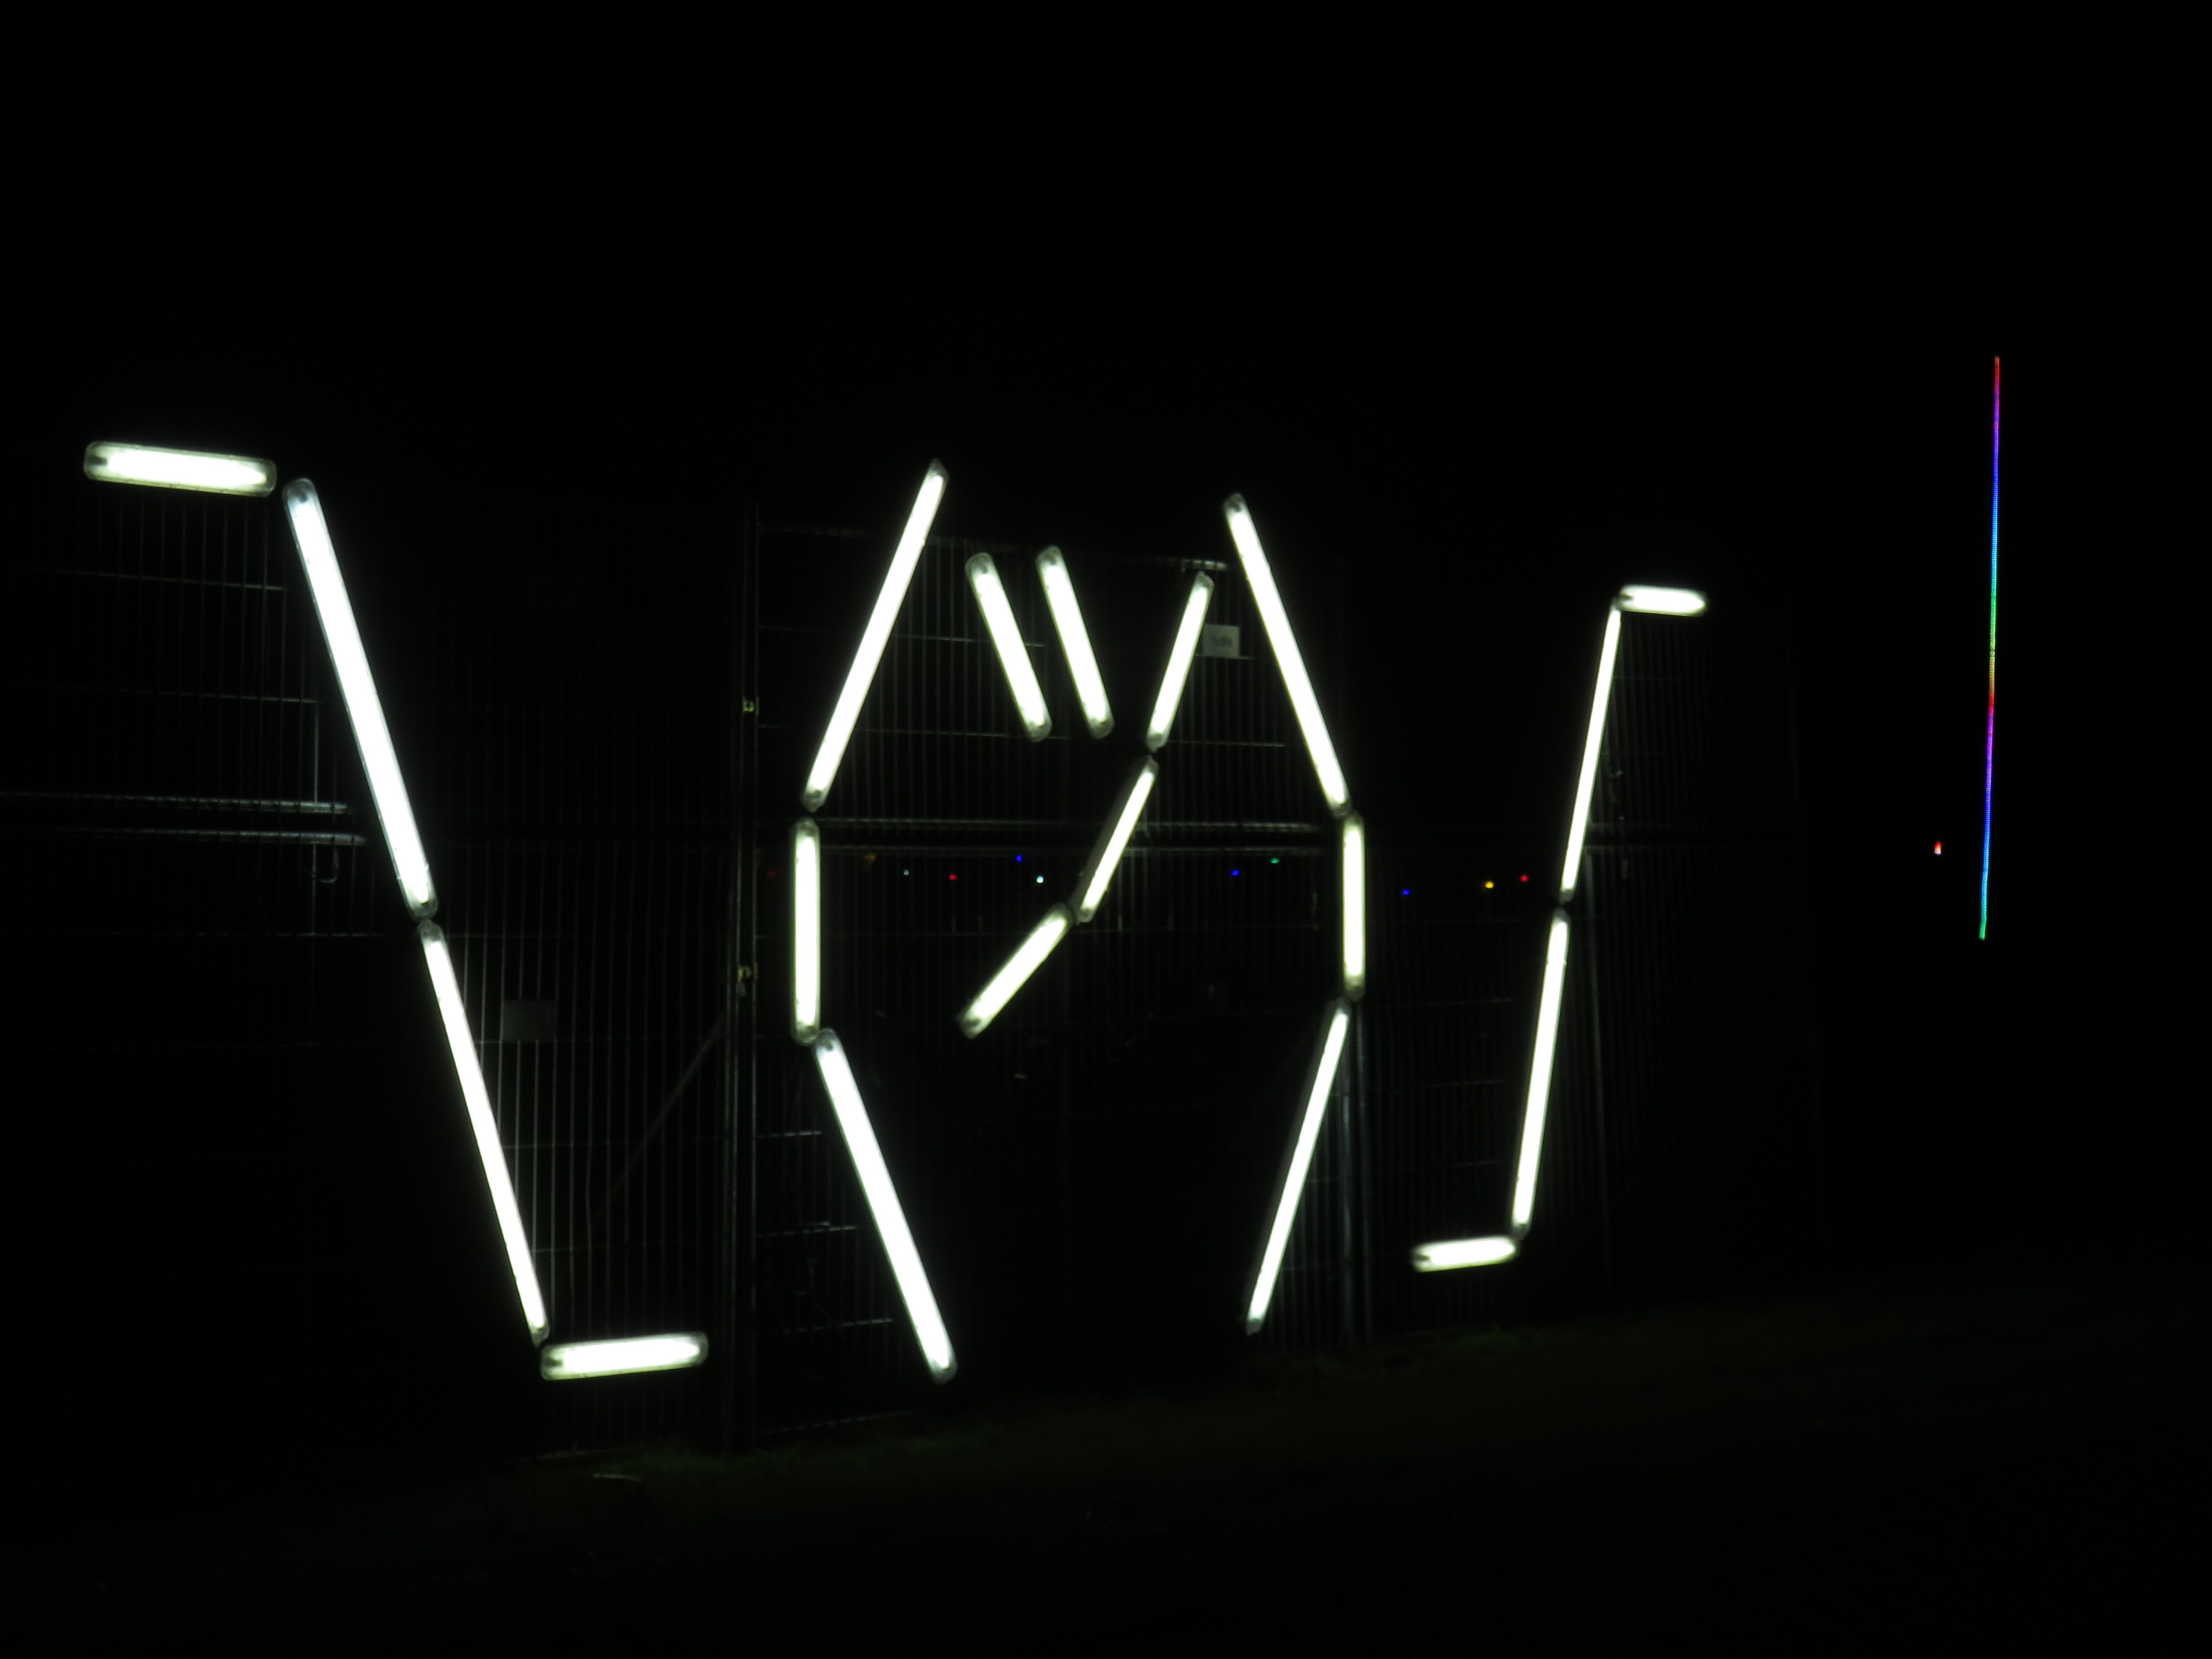
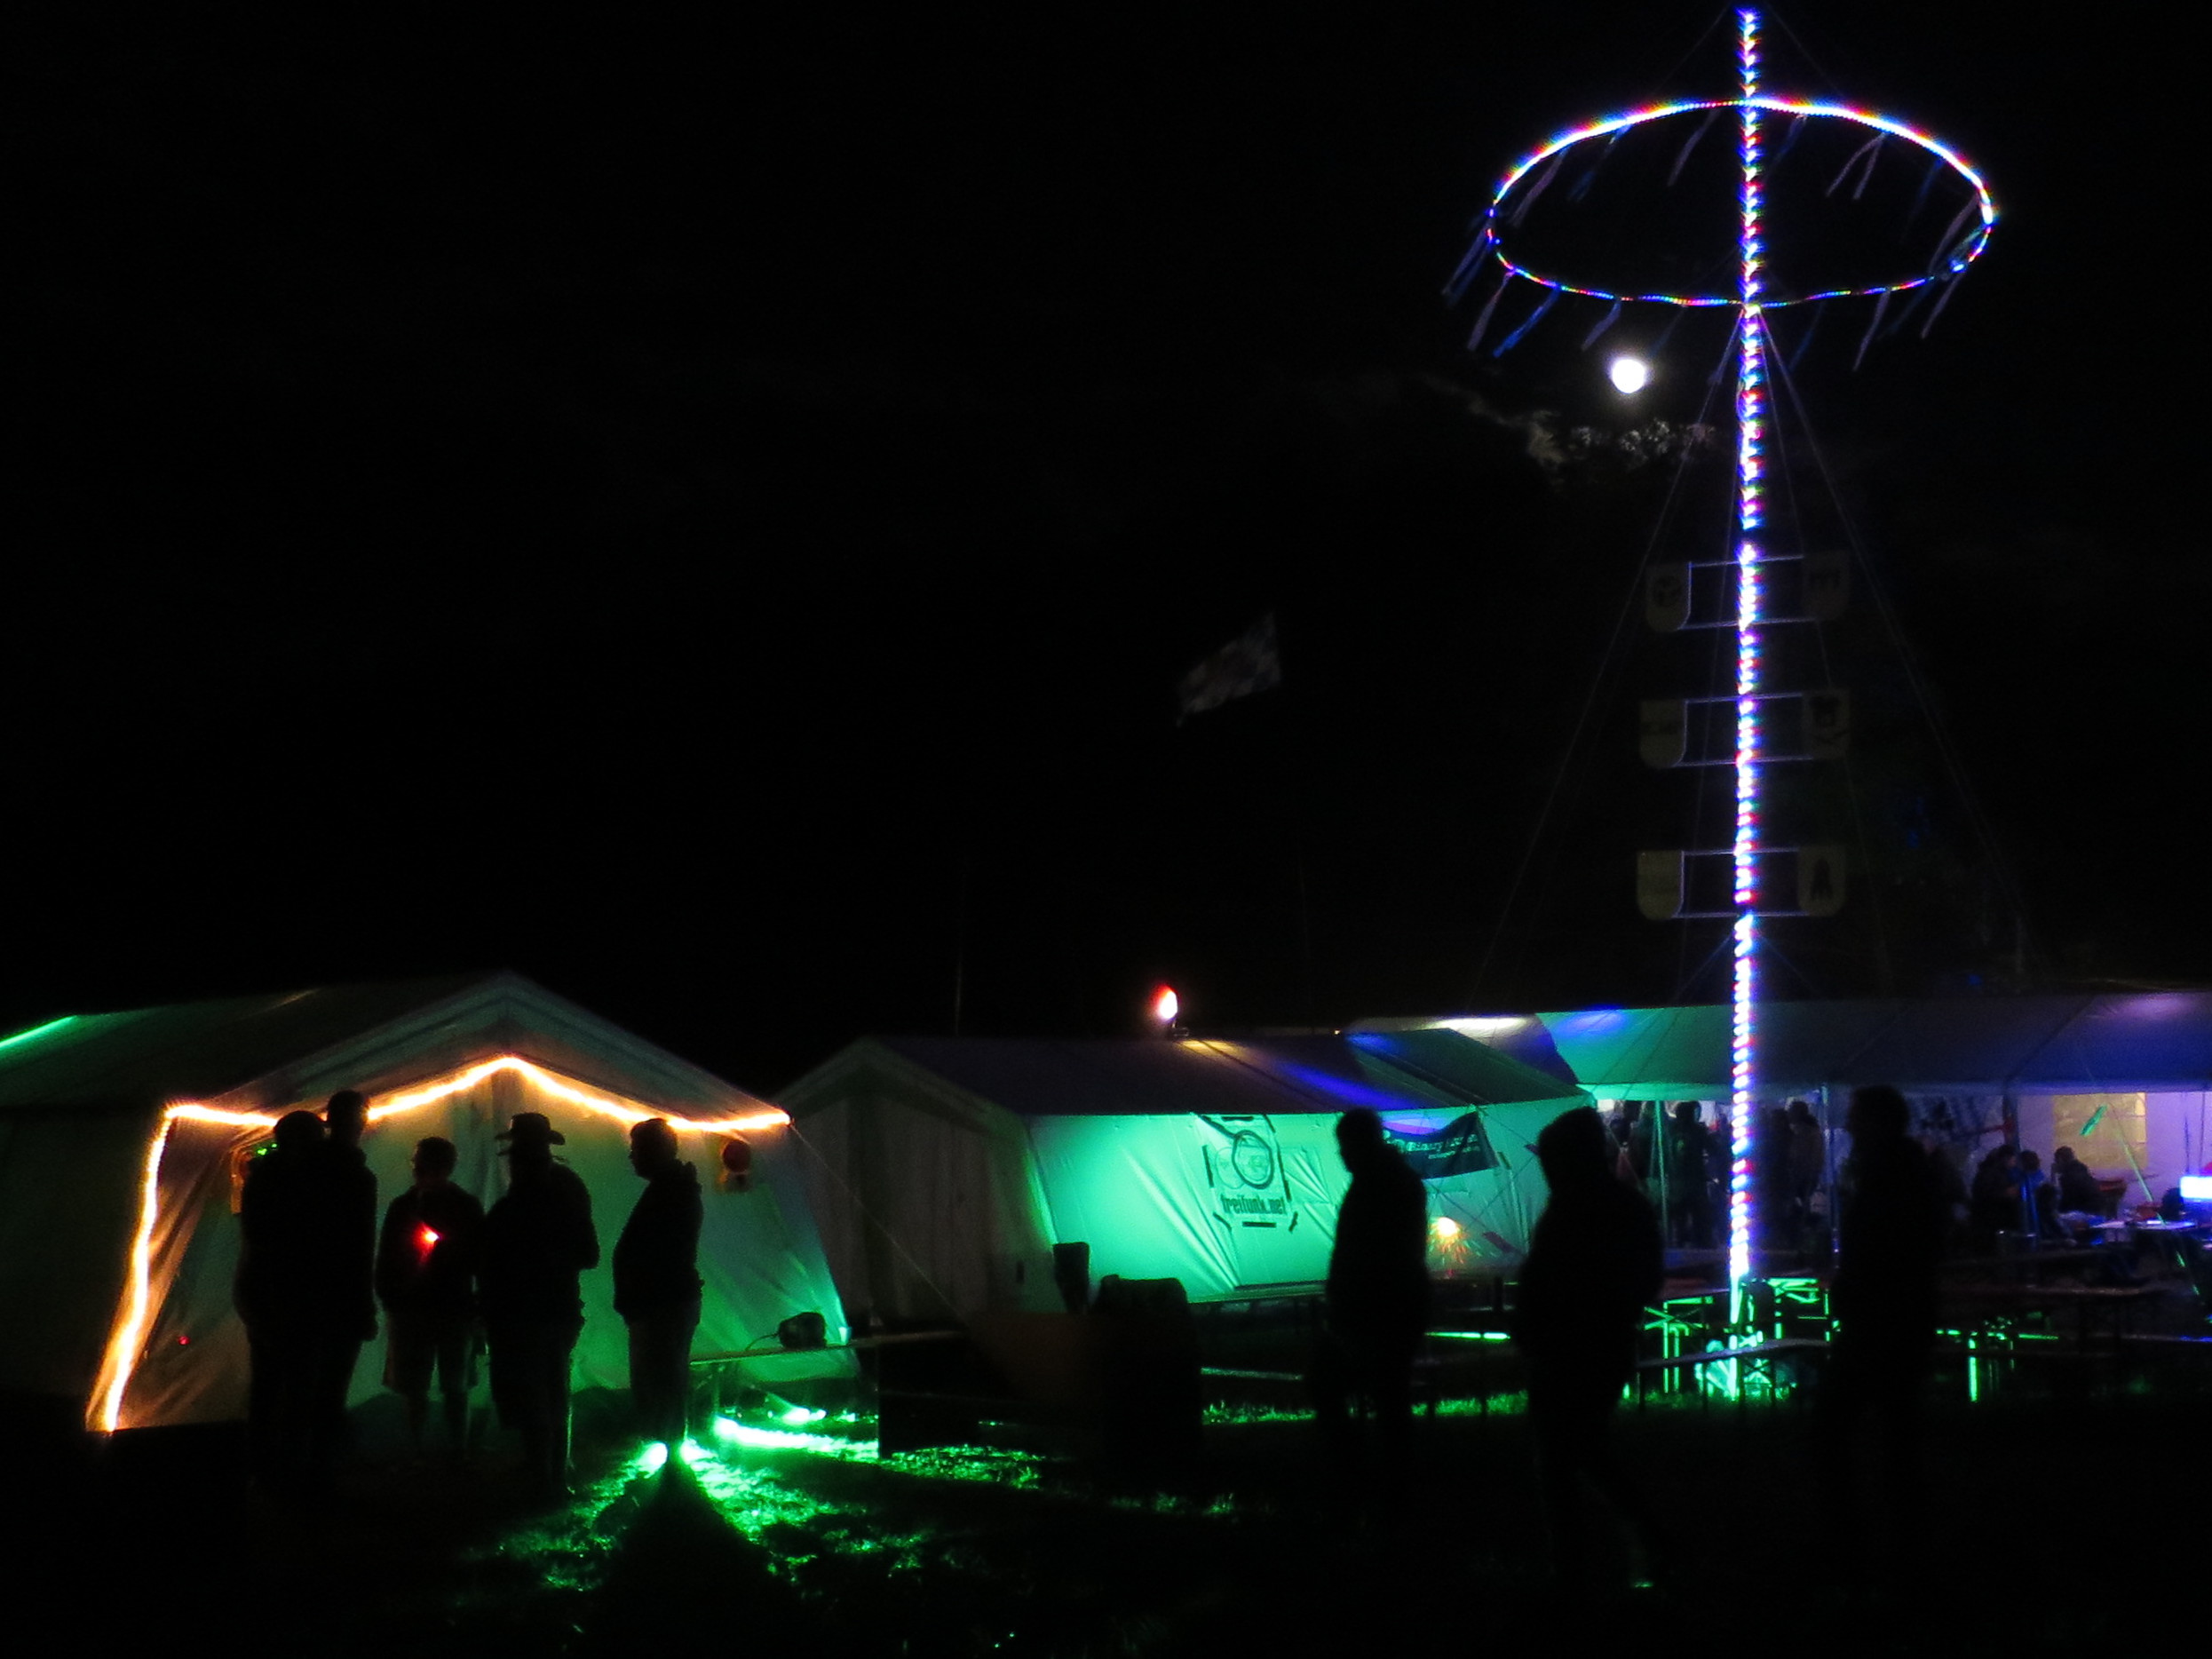
Almost five years ago a group of hackers and other technically minded oddballs camped in a field in the Netherlands to have fun and play with LEDs:
I was lucky enough to be in Europe at the time, so I came along.
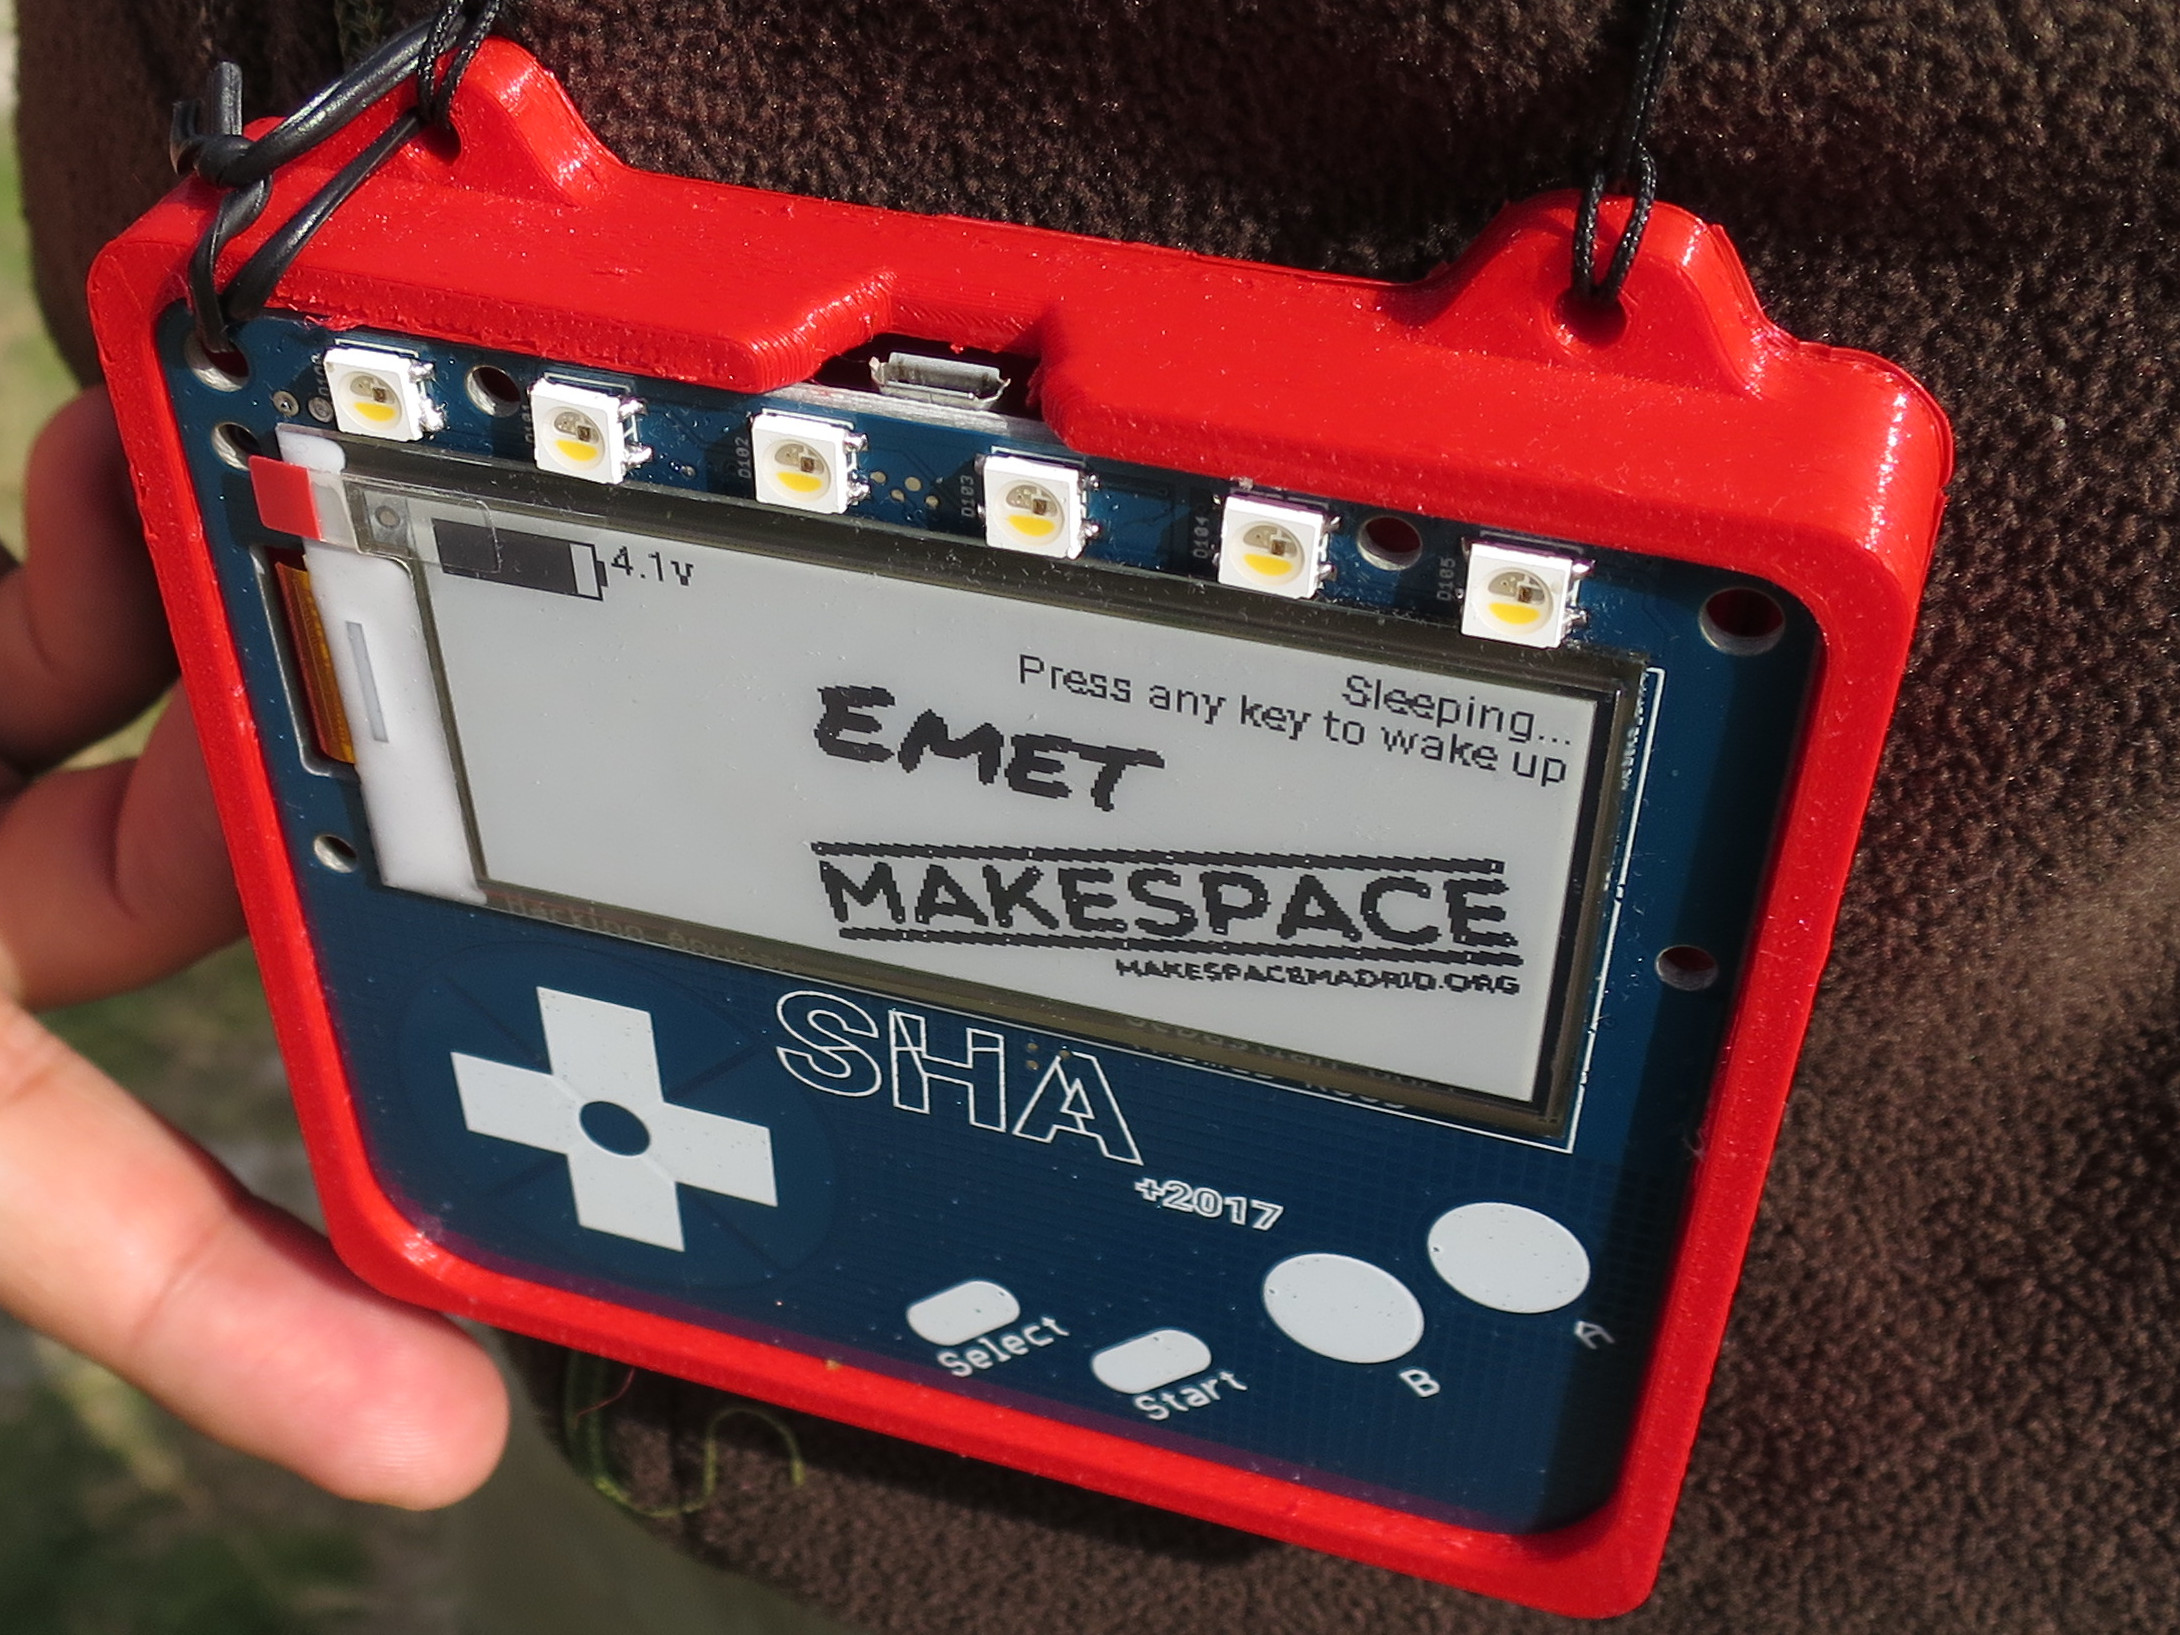
Every attendee received an open source hardware badge. It has an e-ink display, RGB LEDs, touch pads in a controller layout, an ESP32 microcontroller for Wi-Fi/Bluetooth, and capacity for expansion boards called scarves. There was a badge hacking tent where attendees could solder LEDs onto their badges or do other modifications.
A "Hatchery" app store let everyone download and share new apps. The badge was so successful that it even suffered a ransomware outbreak! This Hackaday article has more.
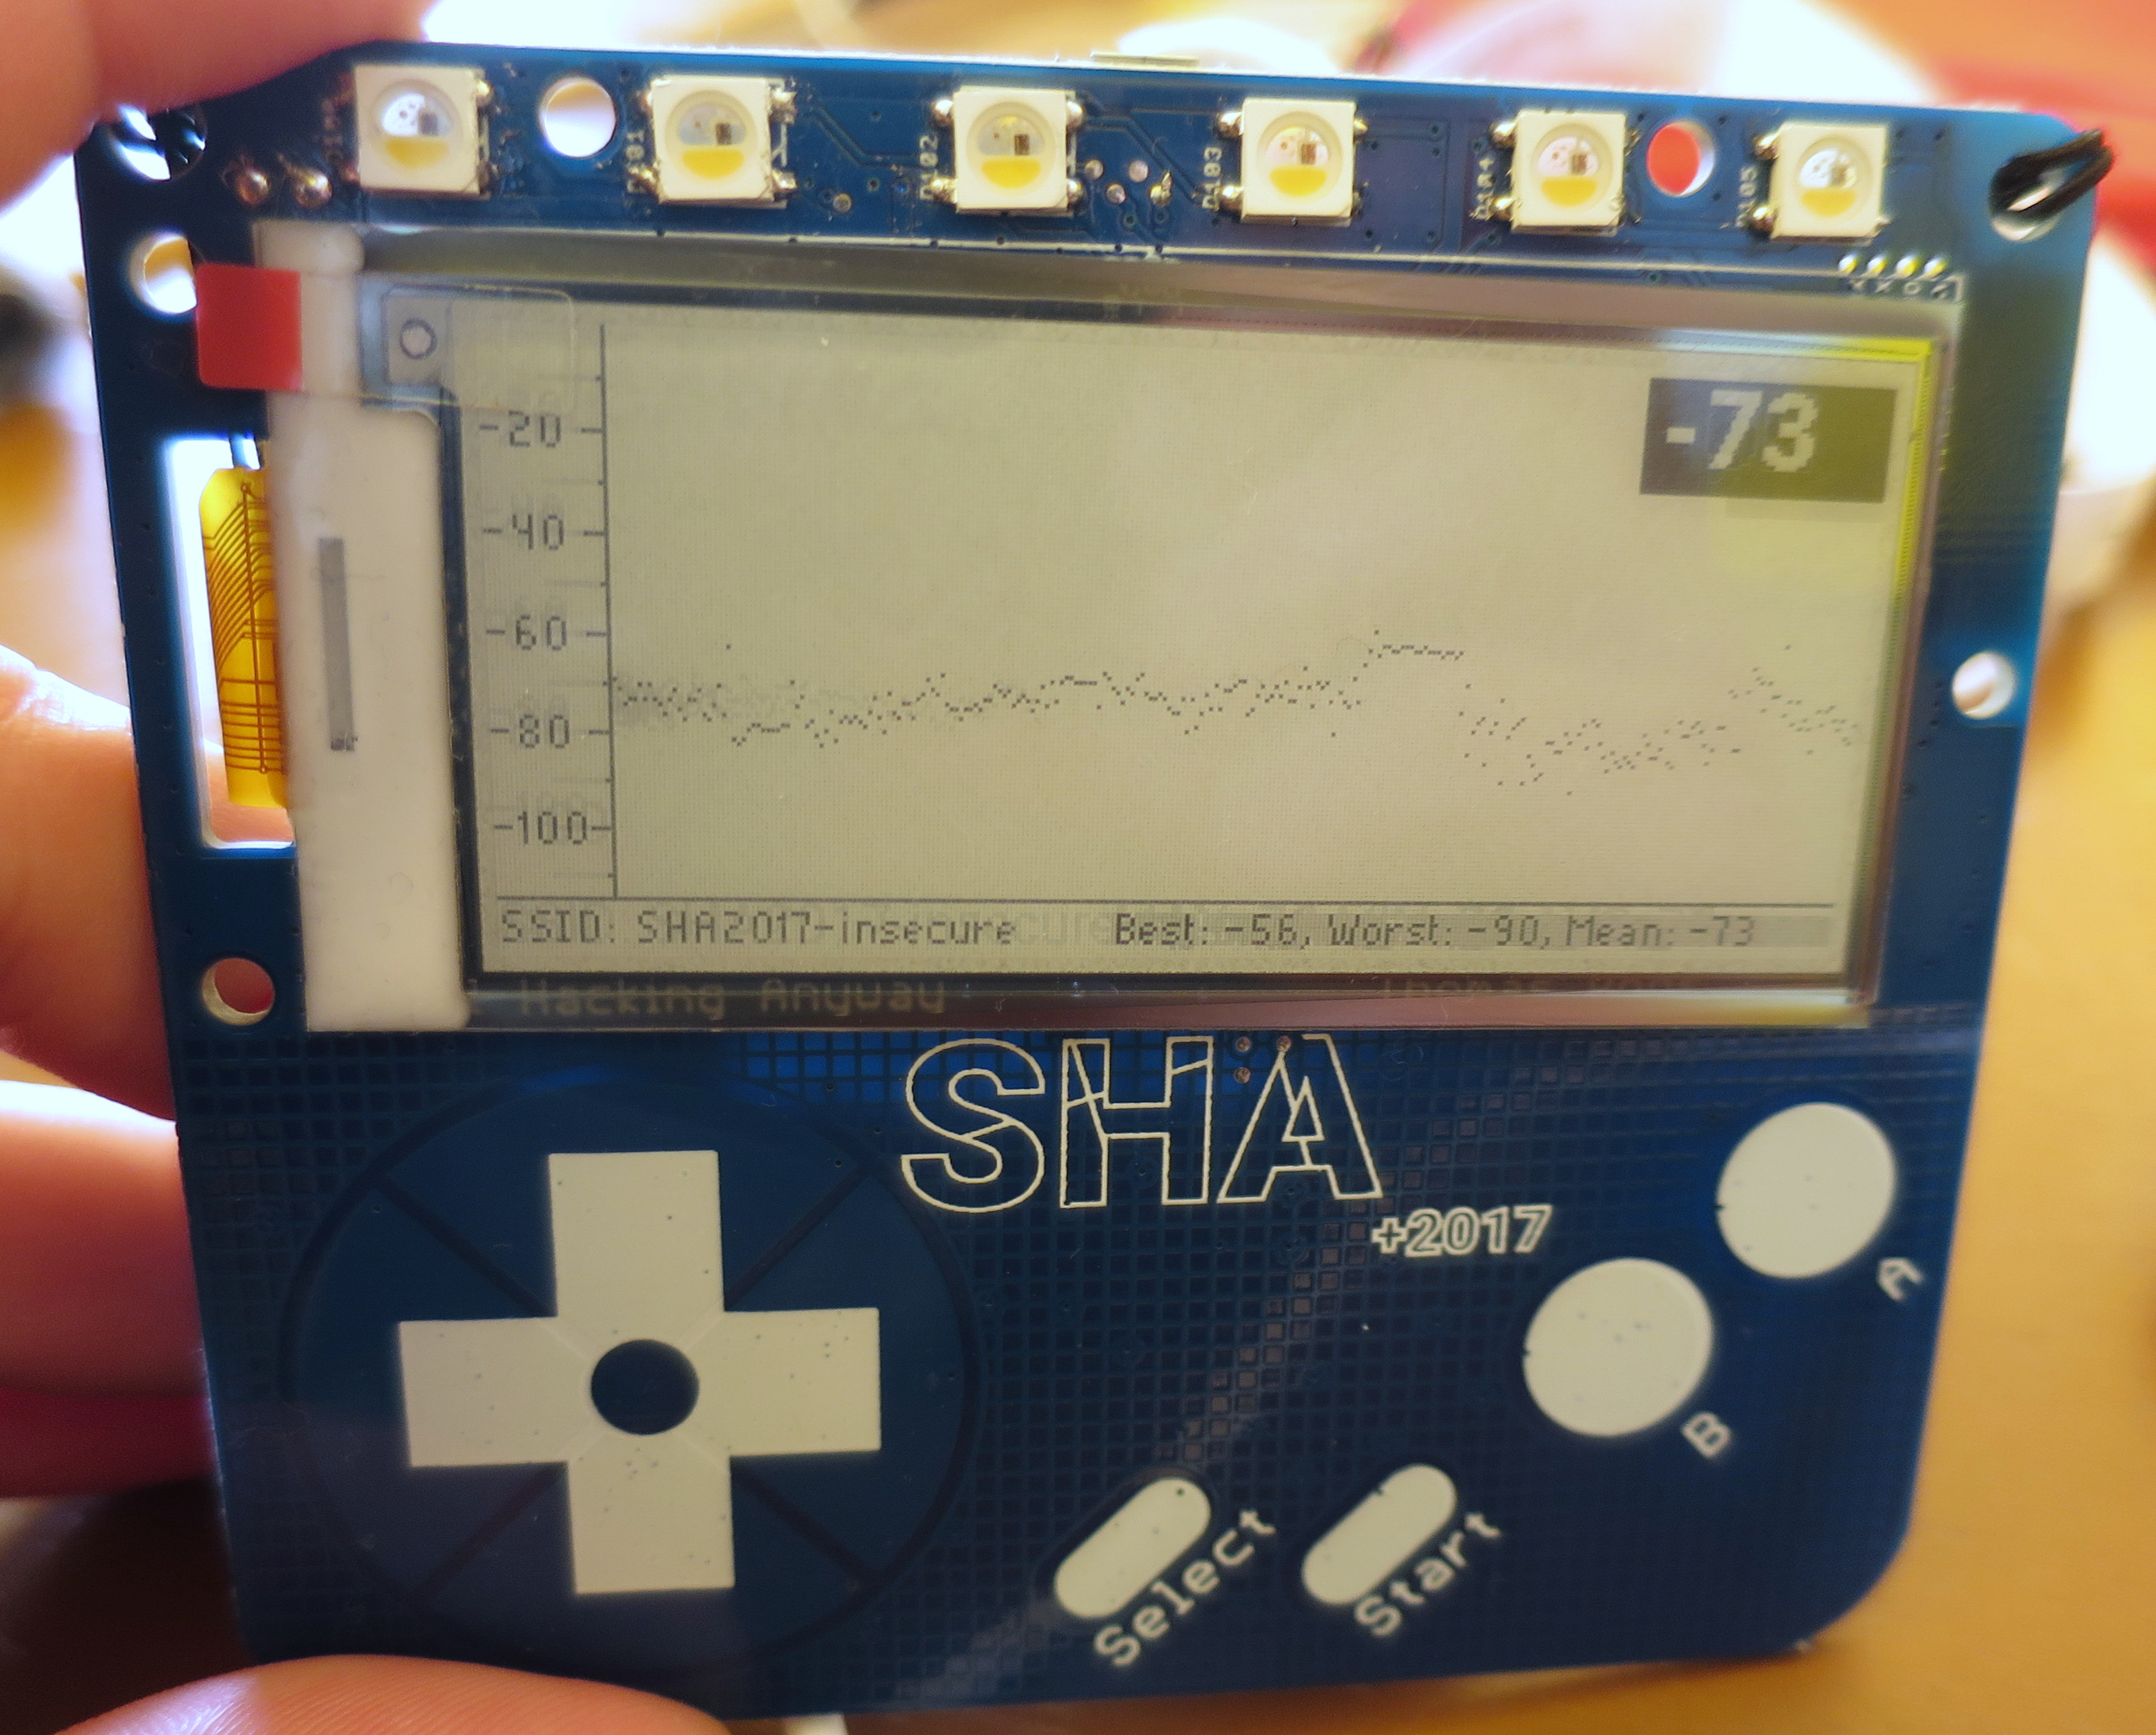
At the camp, my own contribution was a Wi-Fi signal strength monitoring app that graphed the RSSI value. Four years later it's still available to install on your badge.
badge.team
The original SHA2017 badge infrastructure was still online in 2021, but essentially abandoned. Instead, there is something better: badge.team. The badge.team has taken up the task of supporting over a dozen different con/camp badges, providing a common firmware base and a hatchery to share apps for any badge.
This is such an awesome example of open source allowing a project to stay useful and practical over time, and a community working together to keep it like that.
Solar Monitor
Our rooftop solar system has 6kW of panels with a 5kW grid-connected inverter. Because the feed-in tariff for selling electricity to the grid is so low, it's better for us to consume our own solar power rather than sell it back to the electricity grid and then consume power from the grid later.
Therefore, it's great to know how much electricity we are generating and how much we are using at any given time. This can be hard to guess, especially on a cloudy day when your eye is not a good judge of exactly how much sunlight there is.
The goals of the Solar Usage Monitor project:
- Be a passive interface that doesn't need any interaction.
- Show how much electricity we are using in the house and how much solar electricity we are generating.
- Provide enough information to answer questions like "should I turn the heater up right now?" or "is it a good time to run the dishwasher?".
- Not buy anything new. (After all, I already had an InkPlate 10 on the way...)
Solar Infrastructure
Our solar inverter (Fronius Primo) has a Wi-Fi interface and a JSON web API. A Python module exists, so with a few lines of Python it's possible to shovel the current state of power flow into an InfluxDB time series database and view it in Grafana:
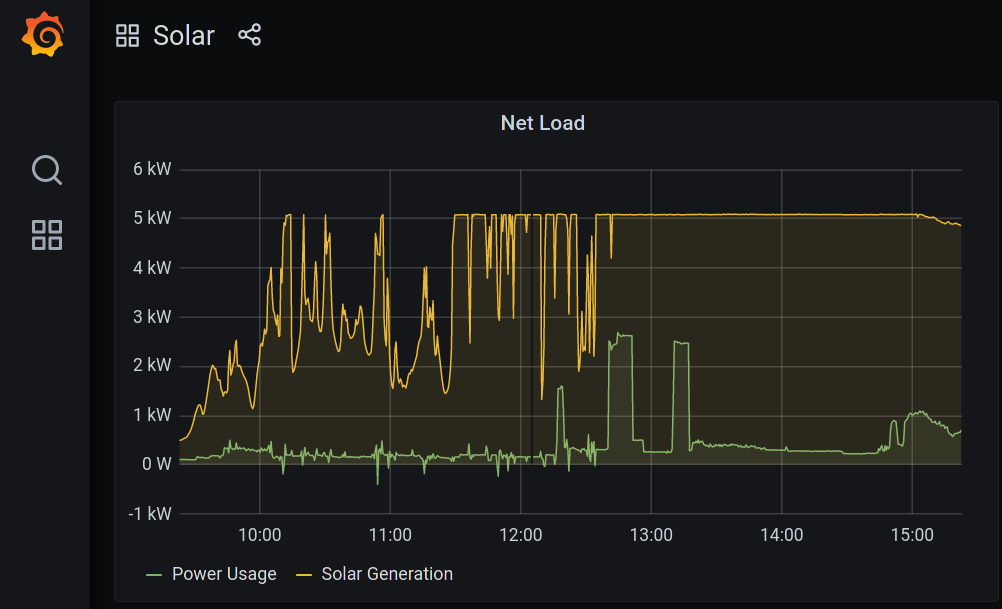
However, a web page dashboard is exactly the kind of interface I want to avoid. Time to show this information on the badge!
MicroPython firmware
The language of choice for badge programmers is MicroPython. I have a lot of respect for MicroPython: out of the many "run this dynamic garbage collected language on a tiny microcontroller!" environments, it delivers the most in my experience.
The solar monitor firmware has a pretty simple use case:
- Connect to Wi-Fi
- Query InfluxDB for a JSON payload with the solar usage data
- Draw a graph and a numeric summary of the data on the e-ink display
- Sleep for a bit
- Go back to step 2
MicroPython Performance
Any time I've written MicroPython, I've followed these basic steps:
- Write code as if it was for CPython on a "big" computer.
- Run that in MicroPython
- Rewrite the part which was too slow or ran out of memory
- Repeat until all is well
This doesn't necessarily scale to big projects, projects that need to be very reliable, or library code where you can't anticipate the user's constraints. However it's worked well for my little projects, I'm always pleasantly surprised by how little code needs rewriting in step 3.
For the solar monitor, it's very unlikely the firmware will be "too slow":
- e-ink displays take a second or two to physically update their pixels.
- Even updating every five or ten seconds would be plenty.
- The badge is going to be permanently mains powered, and it only uses a few Watts maximum, so I won't notice any differences in power consumption.
However, there is definitely a chance for "ran out of memory". Dynamic garbage collected languages are prone to "allocation bubbles": some nice neat readable code that looks innocent but allocates multiple short-lived temporary copies of a memory buffer.
These can be very hard to spot - especially if you're not familiar with the details of the language, it can be hard to tell exactly what's going on. When I think about avoiding "allocation bubbles" in Python I often think of Alex Gaynor's 2014 talk Fast Python, Slow Python where he talks about how idiomatic Python code will often hide memory allocations. (His focus is speed, but it turns out that memory allocations are also slow!)
The challenge here is to keep the benefits of Python while avoiding the worst performance or memory issues. It's alternatively possible to write MicroPython as "C without curly braces", but this seems like a waste to me.
String bubble!
After some debugging, my naive Python code worked fine apart from this sequence:
resp = urequests.post('http://192.168.66.1:8086/query?db=sensors&epoch=s',
                          data=b'q='+query,
                          headers={
                          'Content-Type': 'application/x-www-form-urlencoded'
                          })
text = resp.text
resp.close()

if not len(text):
    return []
data = json.loads(text)
result = [Sample(*x) for x in data['results'][0]['series'][0]['values']]
result = [s for s in result if not s.is_empty]   # remove all the empty samples
(Please excuse the hard-coded IP address in this early experiment, and the lack of API authentication...)
First we read the HTTP response as a string (resp.text), which allocates an entire second copy of the response data!
Then we allocate an entire JSON object tree from the string before making two separate lists of sample data via the list comprehensions. This is a lot of memory allocations, and unsurprisingly the program would often crash here depending on how large the JSON response was.
The final code ended up being very close to the original:
   try:
    resp = urequests.post('{}/query?db=sensors&epoch=s'.format(influxdb_url),
                              data=b'q='+query,
                              headers={
                                  'Content-Type': 'application/x-www-form-urlencoded'
                              })
    except OSError:
        print(Failed to connect to InfluxDB server)
        return []

    if resp.status_code != 200:
        print(InfluxDB returned error code {}.format(resp.status_code))
        resp.close()
        return []

    data = json.load(resp.raw)
    resp.close()
    gc.collect()
    result = [Sample(*x) for x in data['results'][0]['series'][0]['values']]
    result = [s for s in result if not s.is_empty()]   # remove all the empty samples
    return result
The only strictly necessary difference is using the file-like interface (json.load(resp.raw)) to read the response into objects, and then forcing a garbage collection immediately after we close the connection and free up the connection buffers. This removes the need to keep two large string buffers in memory simultaneously, and makes sure that the connection memory is freed before we start creating Sample objects.
No doubt there are other improvements that could be made to reduce the memory overhead, but this turned out to be enough.
Powering
The badge has a USB port, but it's in an inconvenient place for hanging on the wall:
How dare the badge designers not think of my very obvious use case!
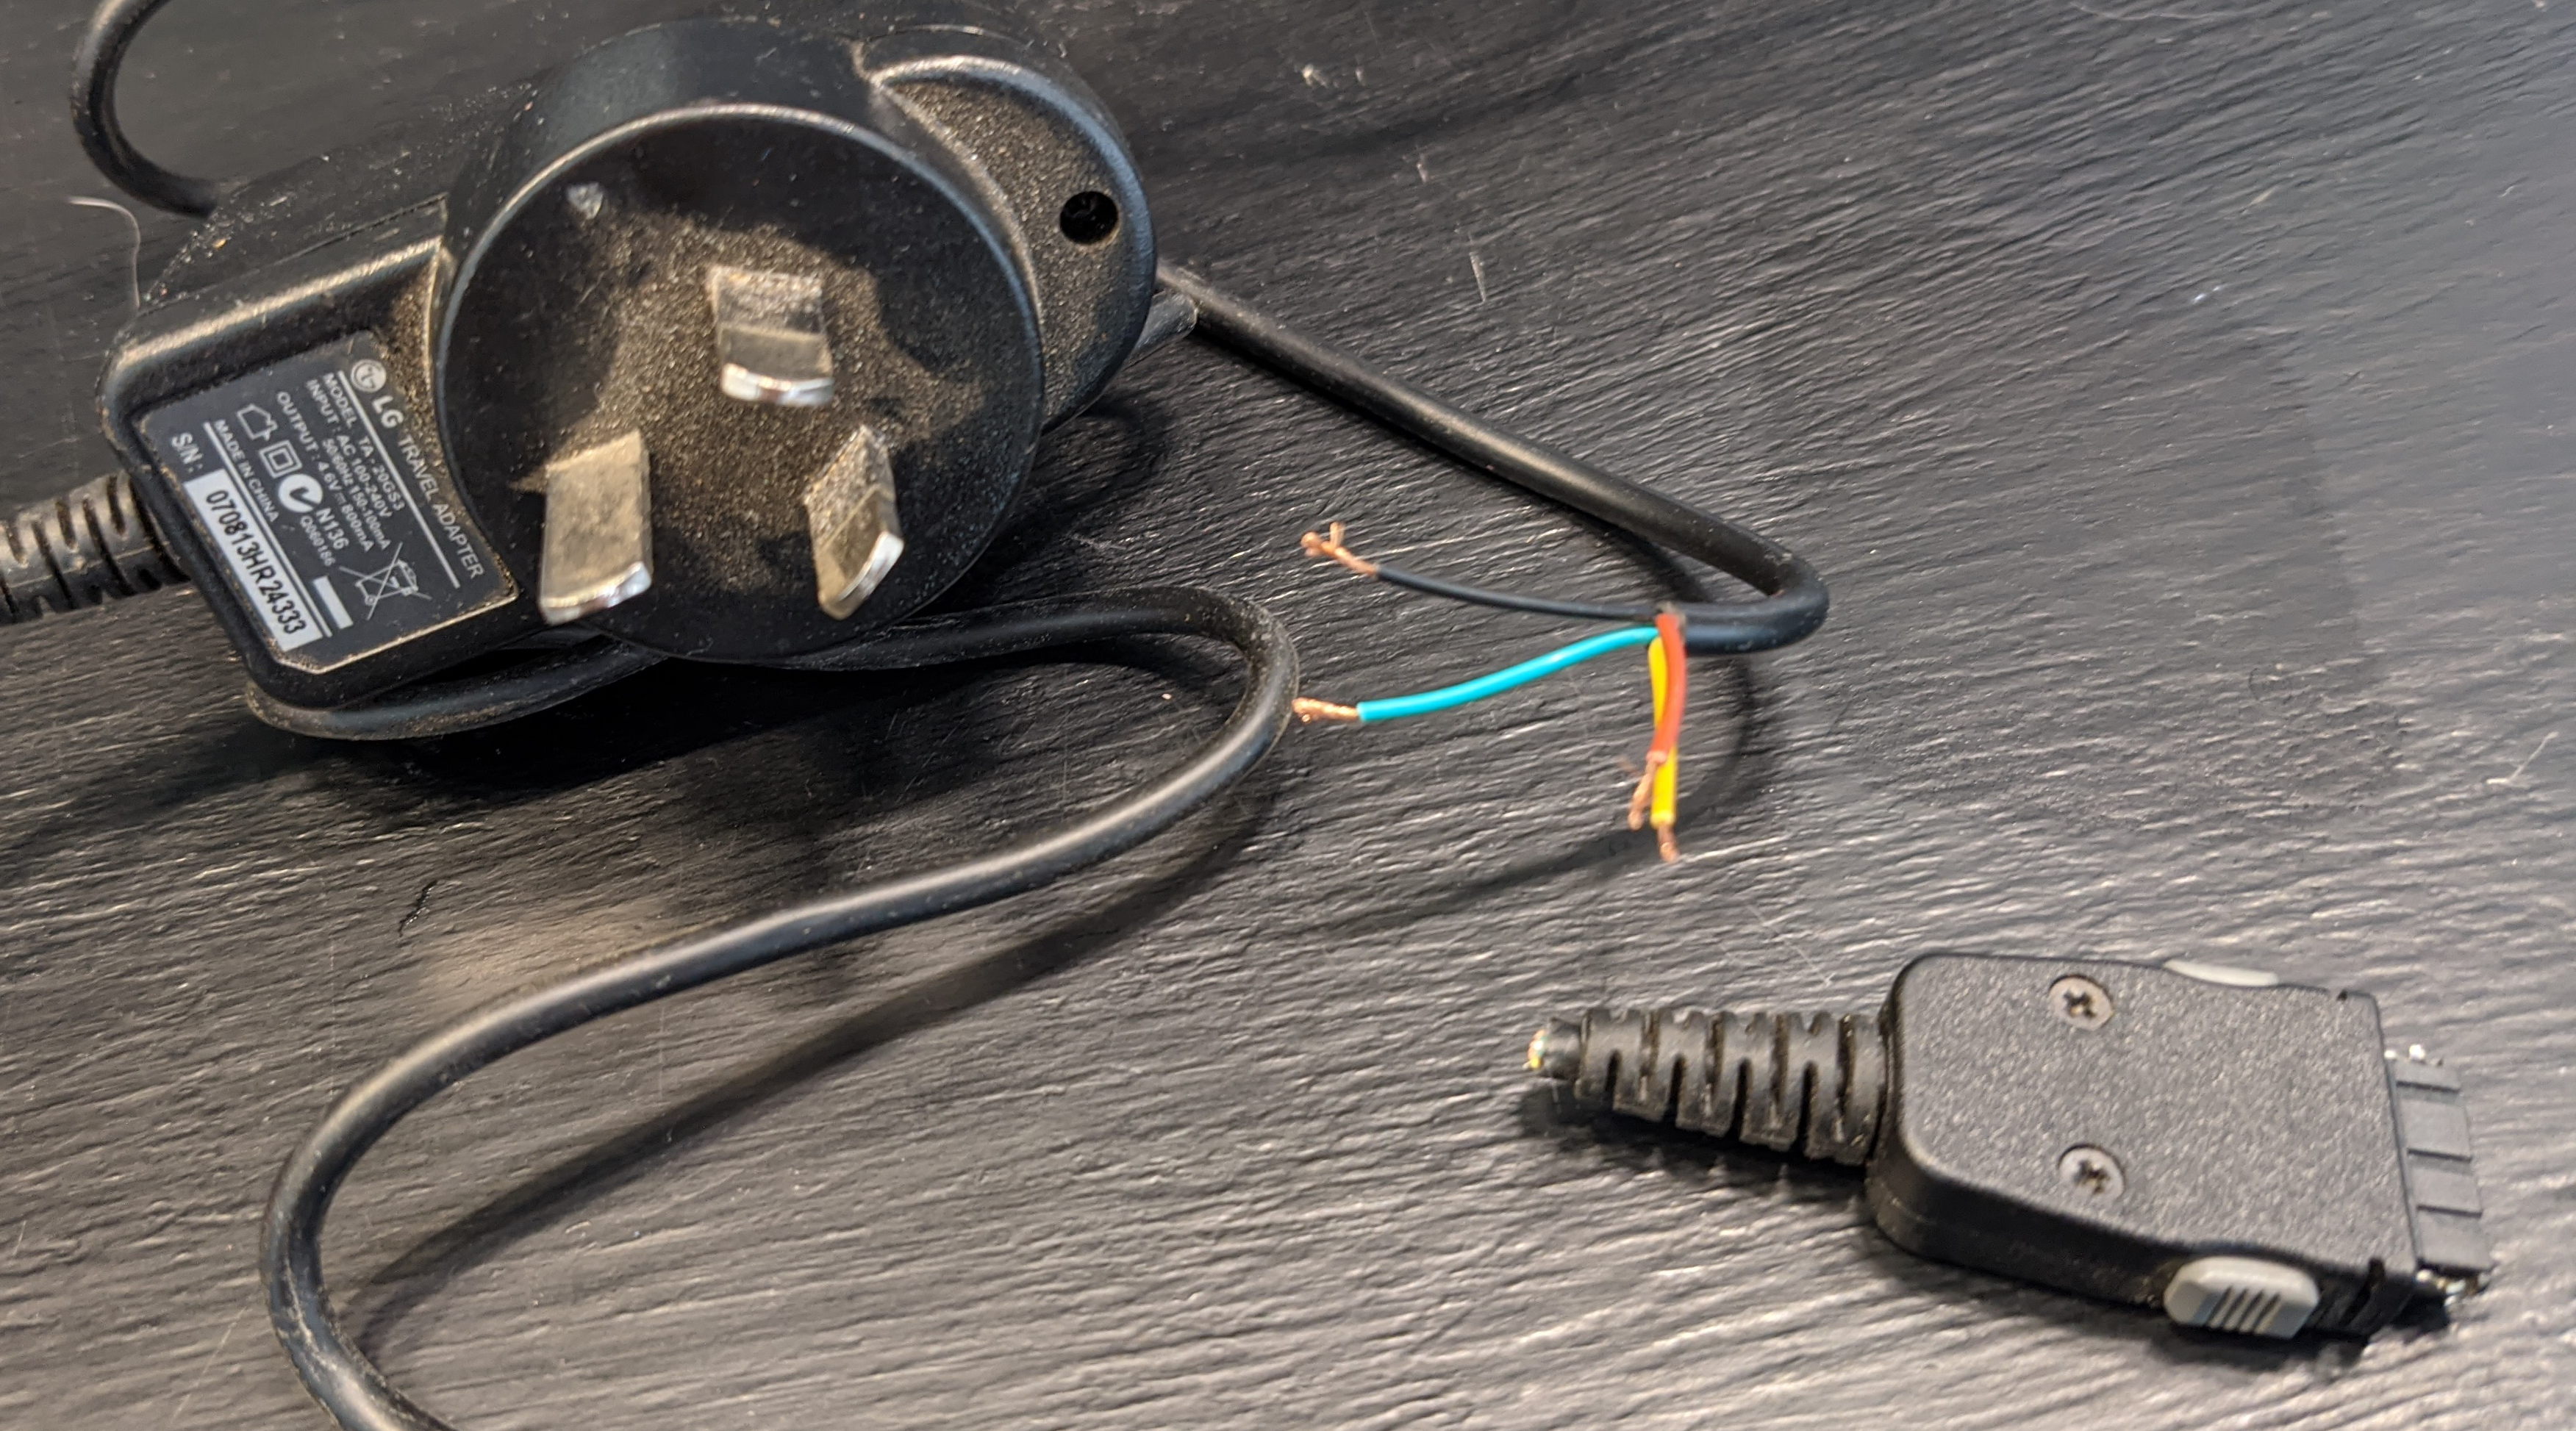
I decided to remove the battery and provide power directly to the battery connector. Sadly, despite having hoarded an enormous box of random plug adapters I didn't have anything in the 3.5V to 4.1V voltage range. Let this be a lesson to hoard more comprehensively!
Bending the "not buy anything new" rule a little, a local junk shop exchanged $5 for this 100% Not New travel charger for an LG Flip Phone, circa 2004:
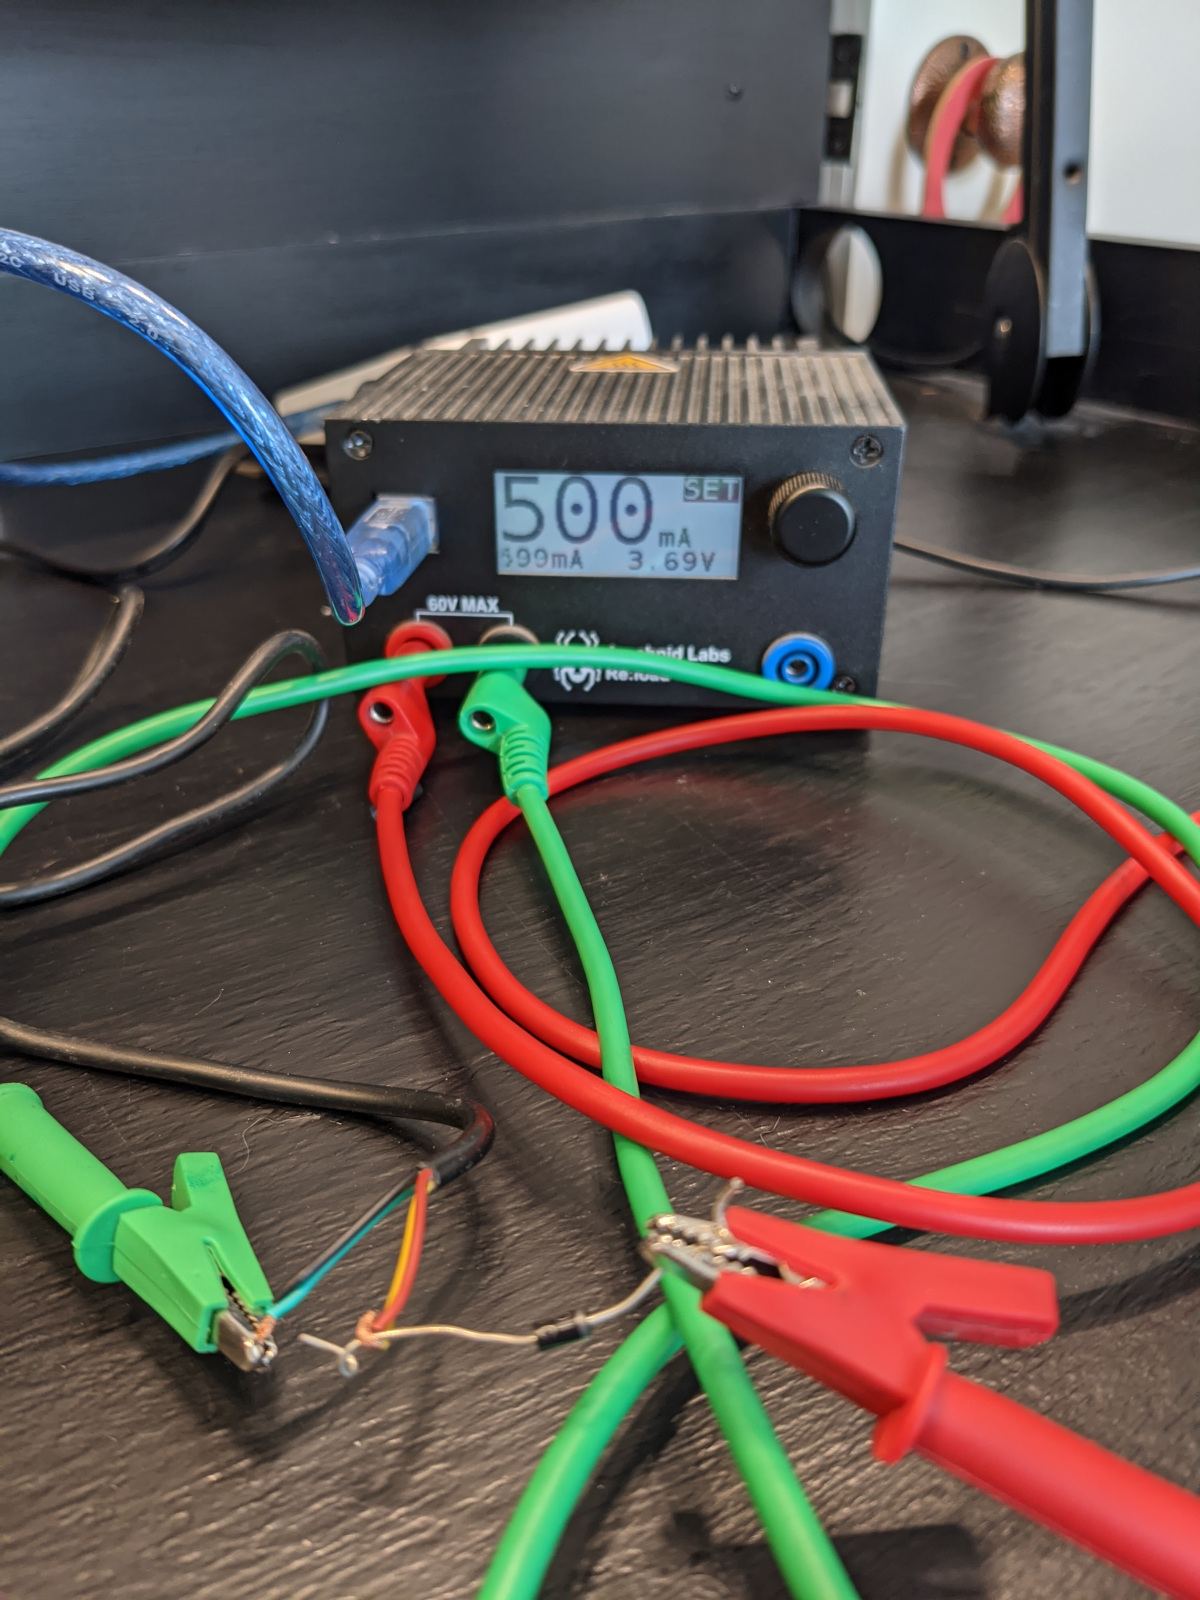
A quick session with the Reload:Pro confirmed that after almost two decades it could still supply its rated 800mA current with only a small drop in voltage:

4.6V is still higher than the maximum Lithium Ion battery voltage of 4.2V... I wasn't certain if the charger chip on the badge might be damaged or confused by this.
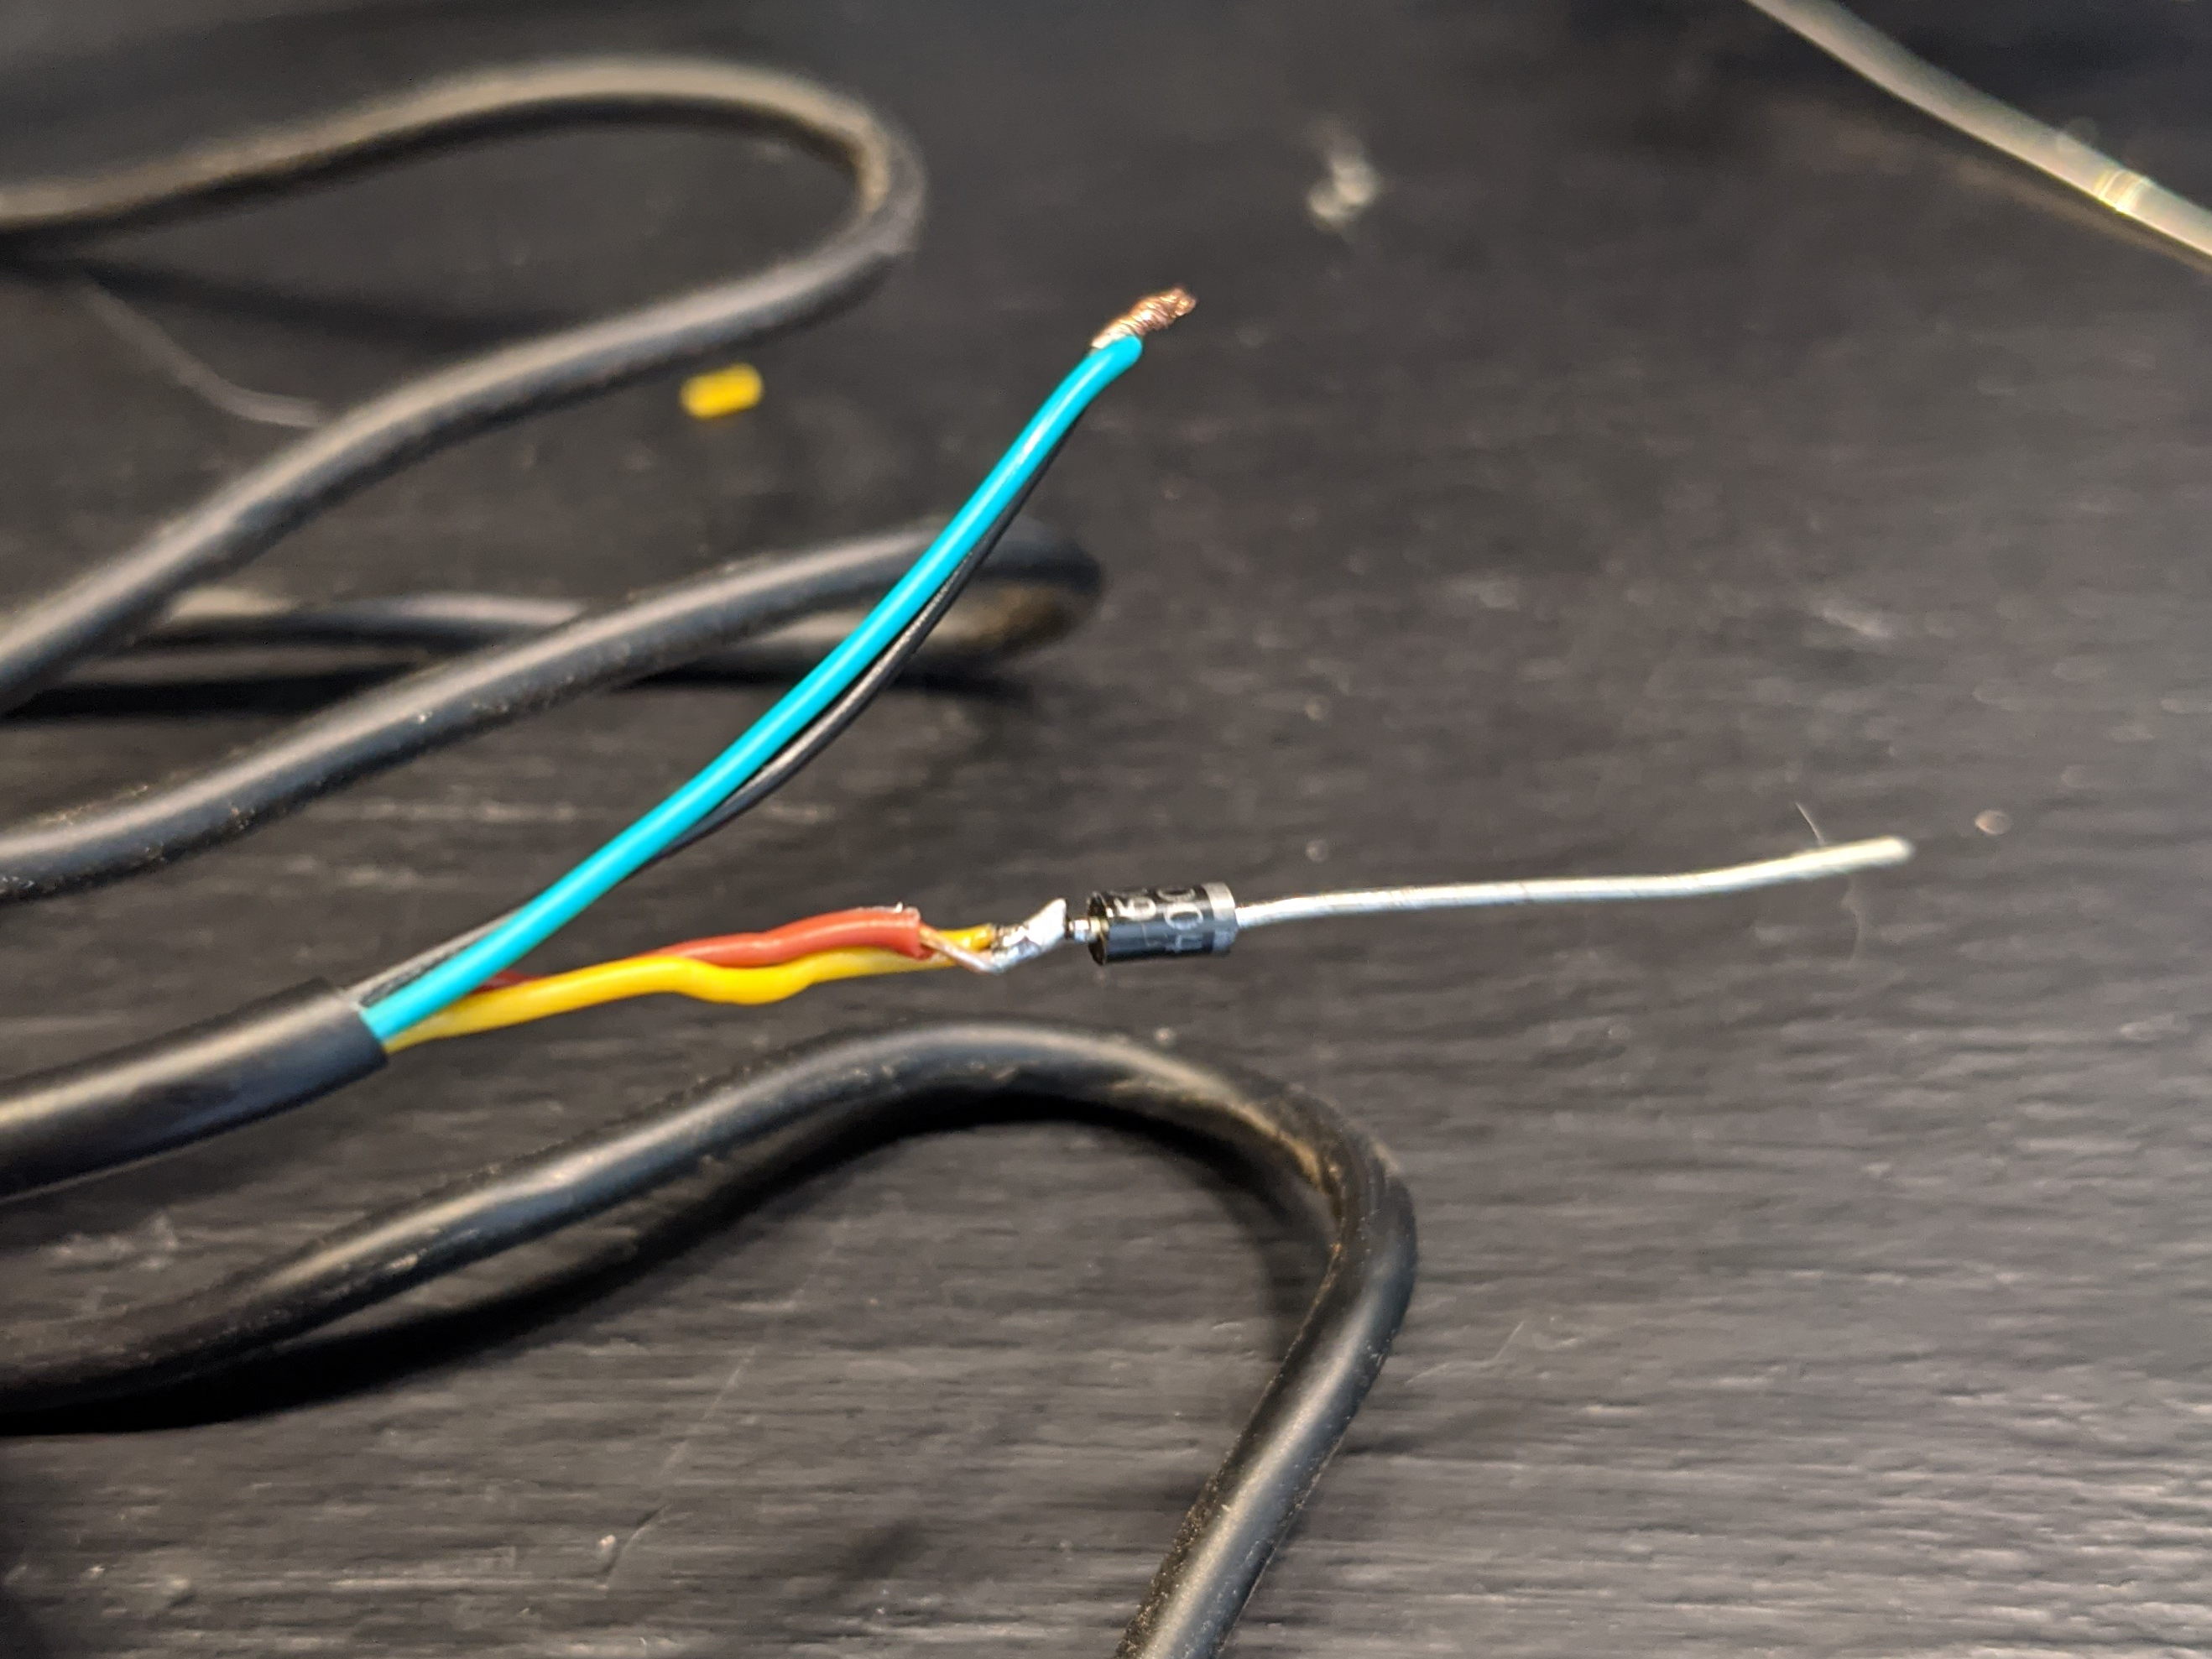
To be sure, I soldered a single diode in series with the adapter output for a 0.7V drop:
Unfortunately, things didn't go well when I plugged the travel adapter into the badge. About 50% of the time the ESP32 would suddenly reset when connecting to Wi-Fi! This was the very familiar problem of not having enough stable power on the board.
The travel adapter may be able to deliver 800mA but the lead is pretty long (resistive drop), and it was probably never designed to stay stable over large current transients...
Continuing with the theme of quick hacks, I soldered some extra surface mount ceramic capacitors and an electrolytic capacitor to the board to help smooth over any power spikes.
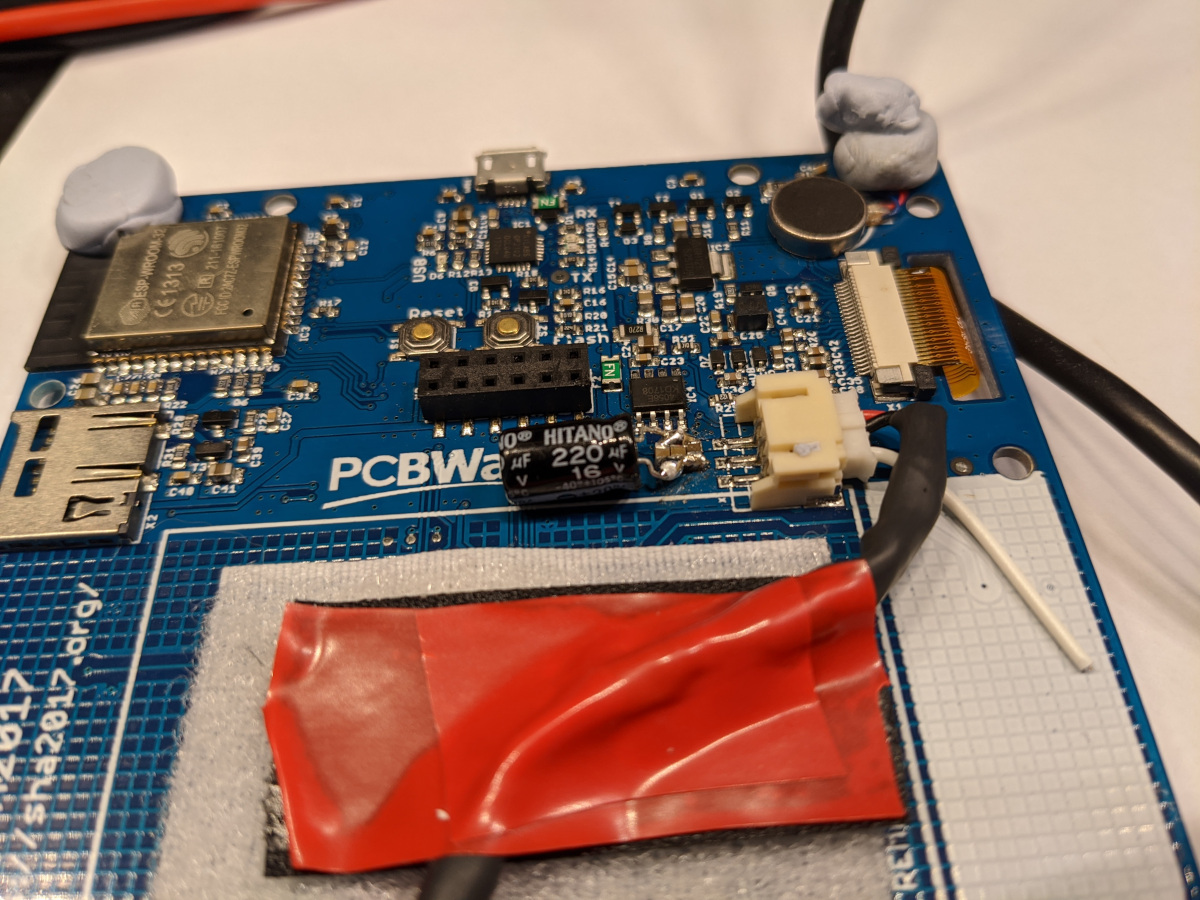
Just like that, a rock solid (dodgy) power supply!
Mounting
The designers of the SHA2017 badge thoughtfully provided some M3 mounting holes on the PCB.
A bit of scrap wire and some standoffs let me create the world's sketchiest picture frame:

Results
The badge has sat on our kitchen wall next to the weather station for almost six months now.
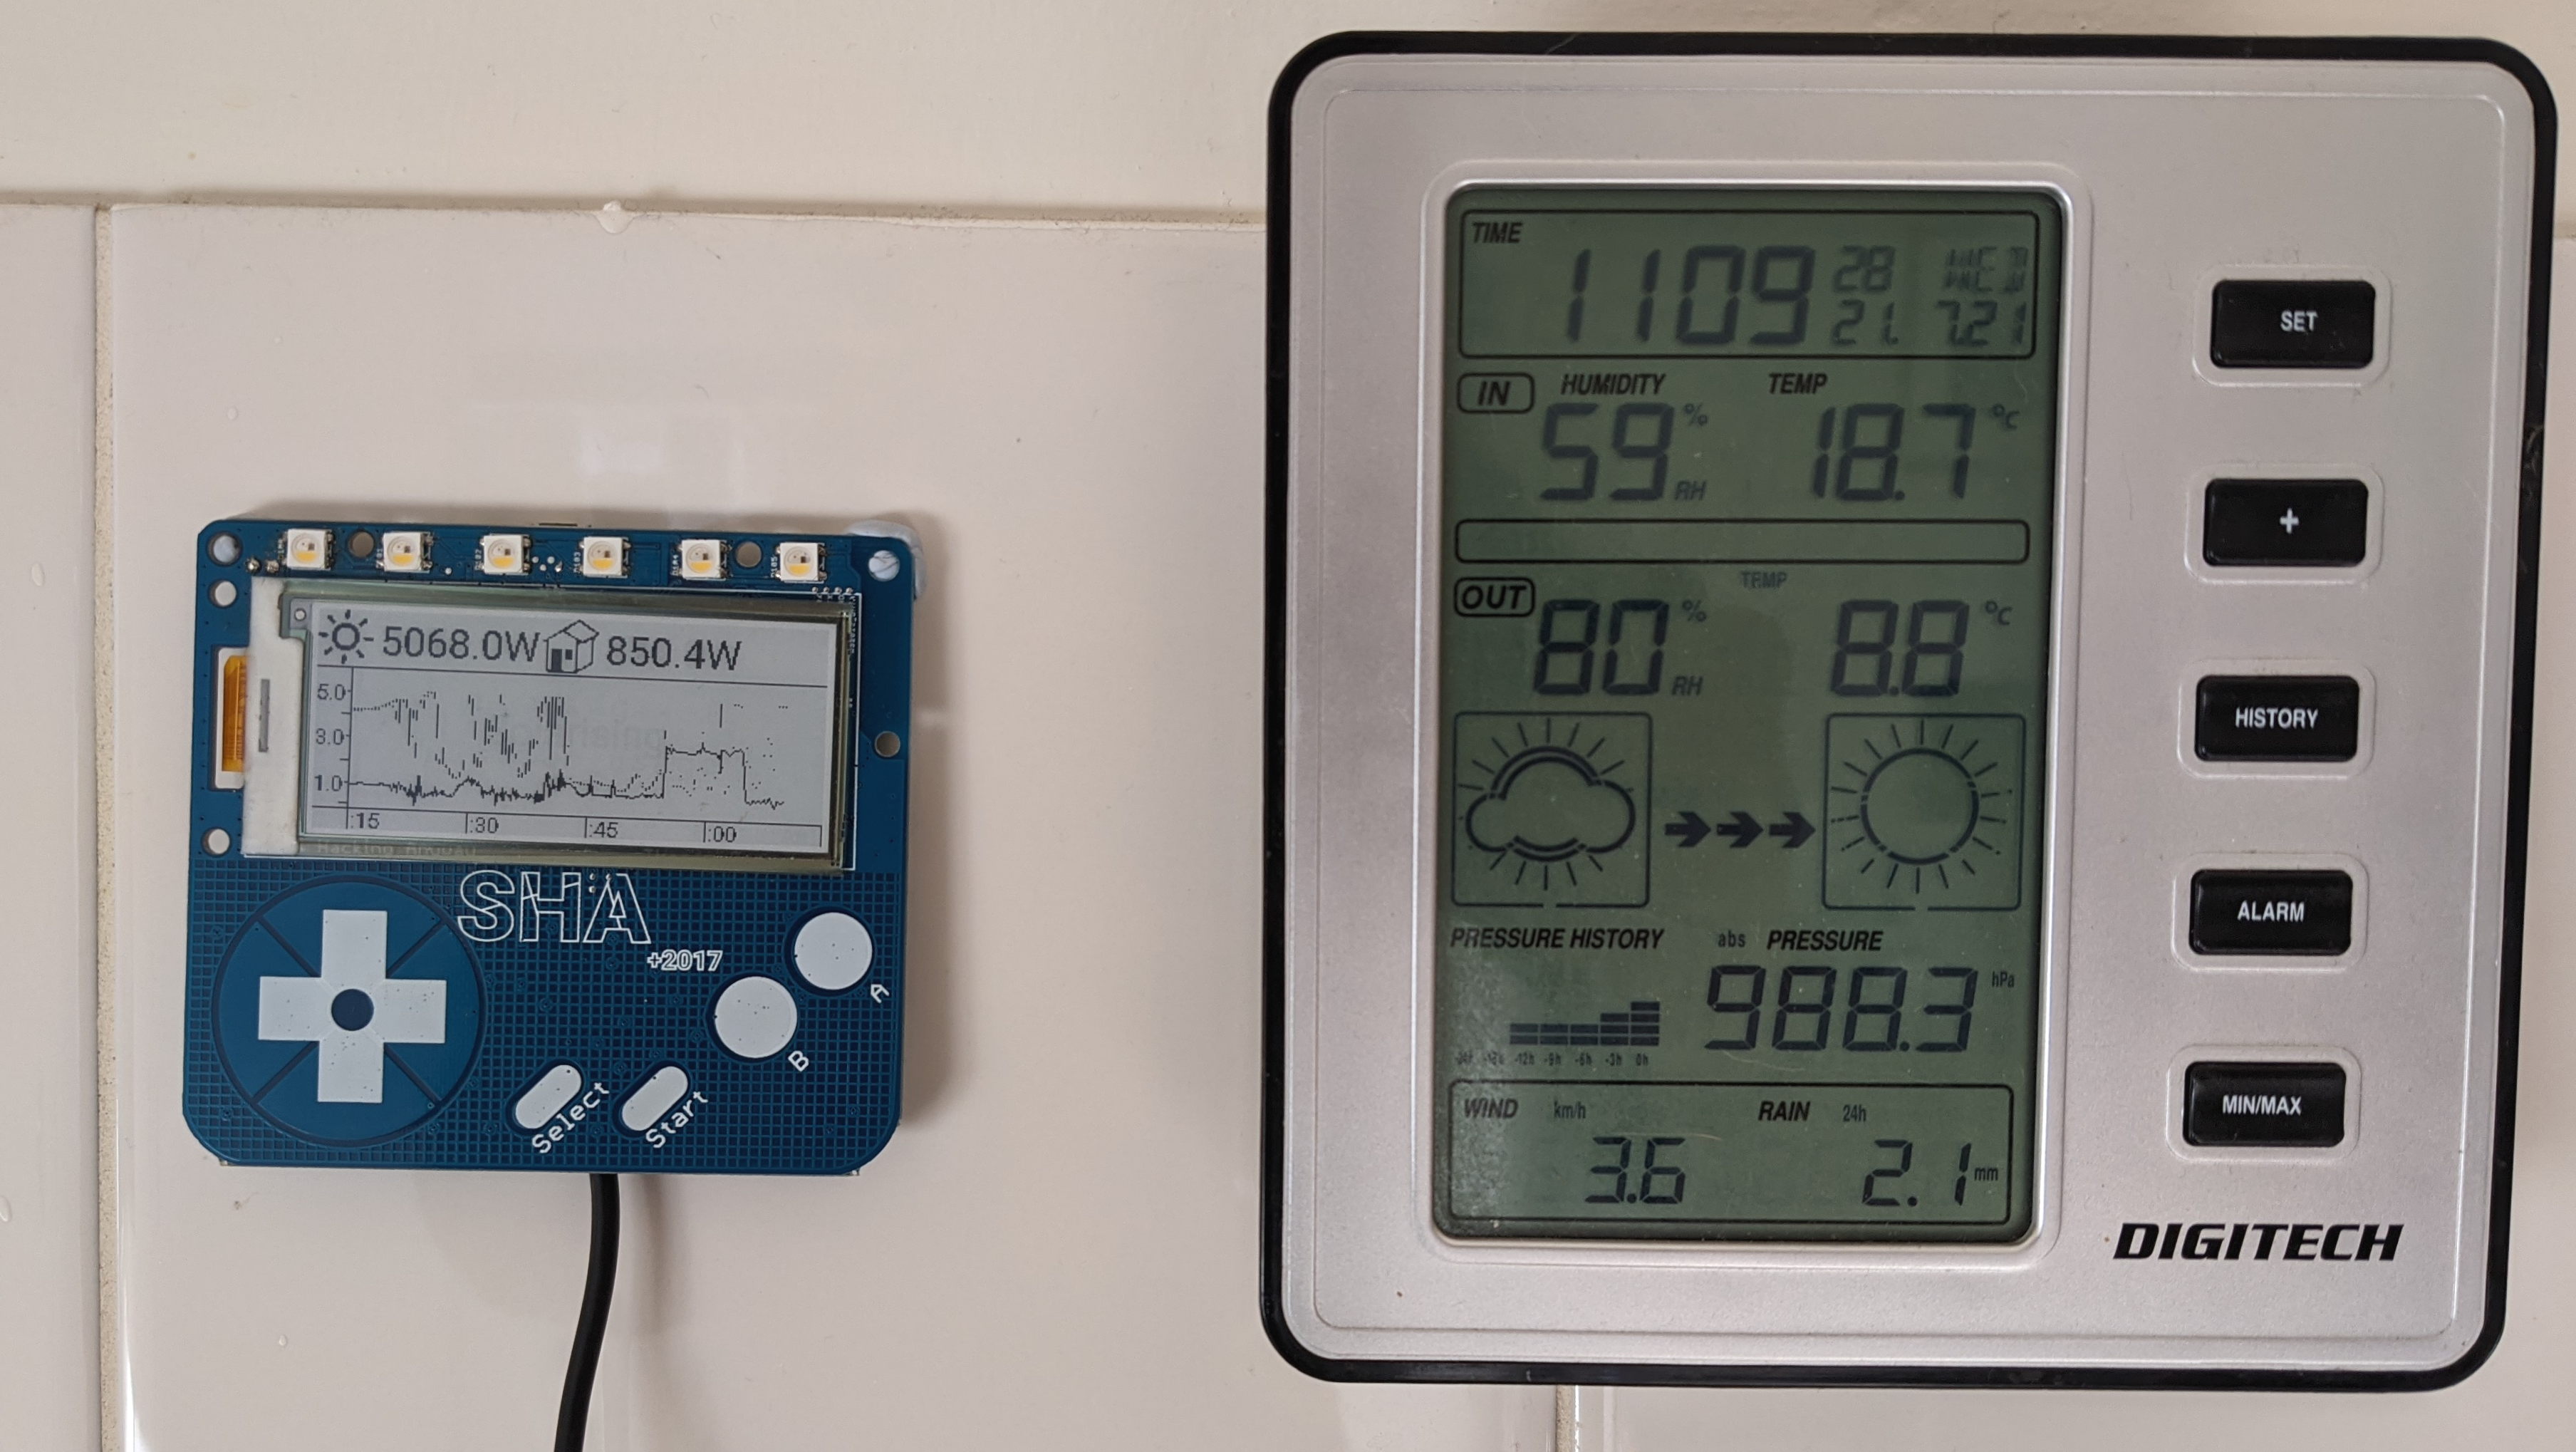
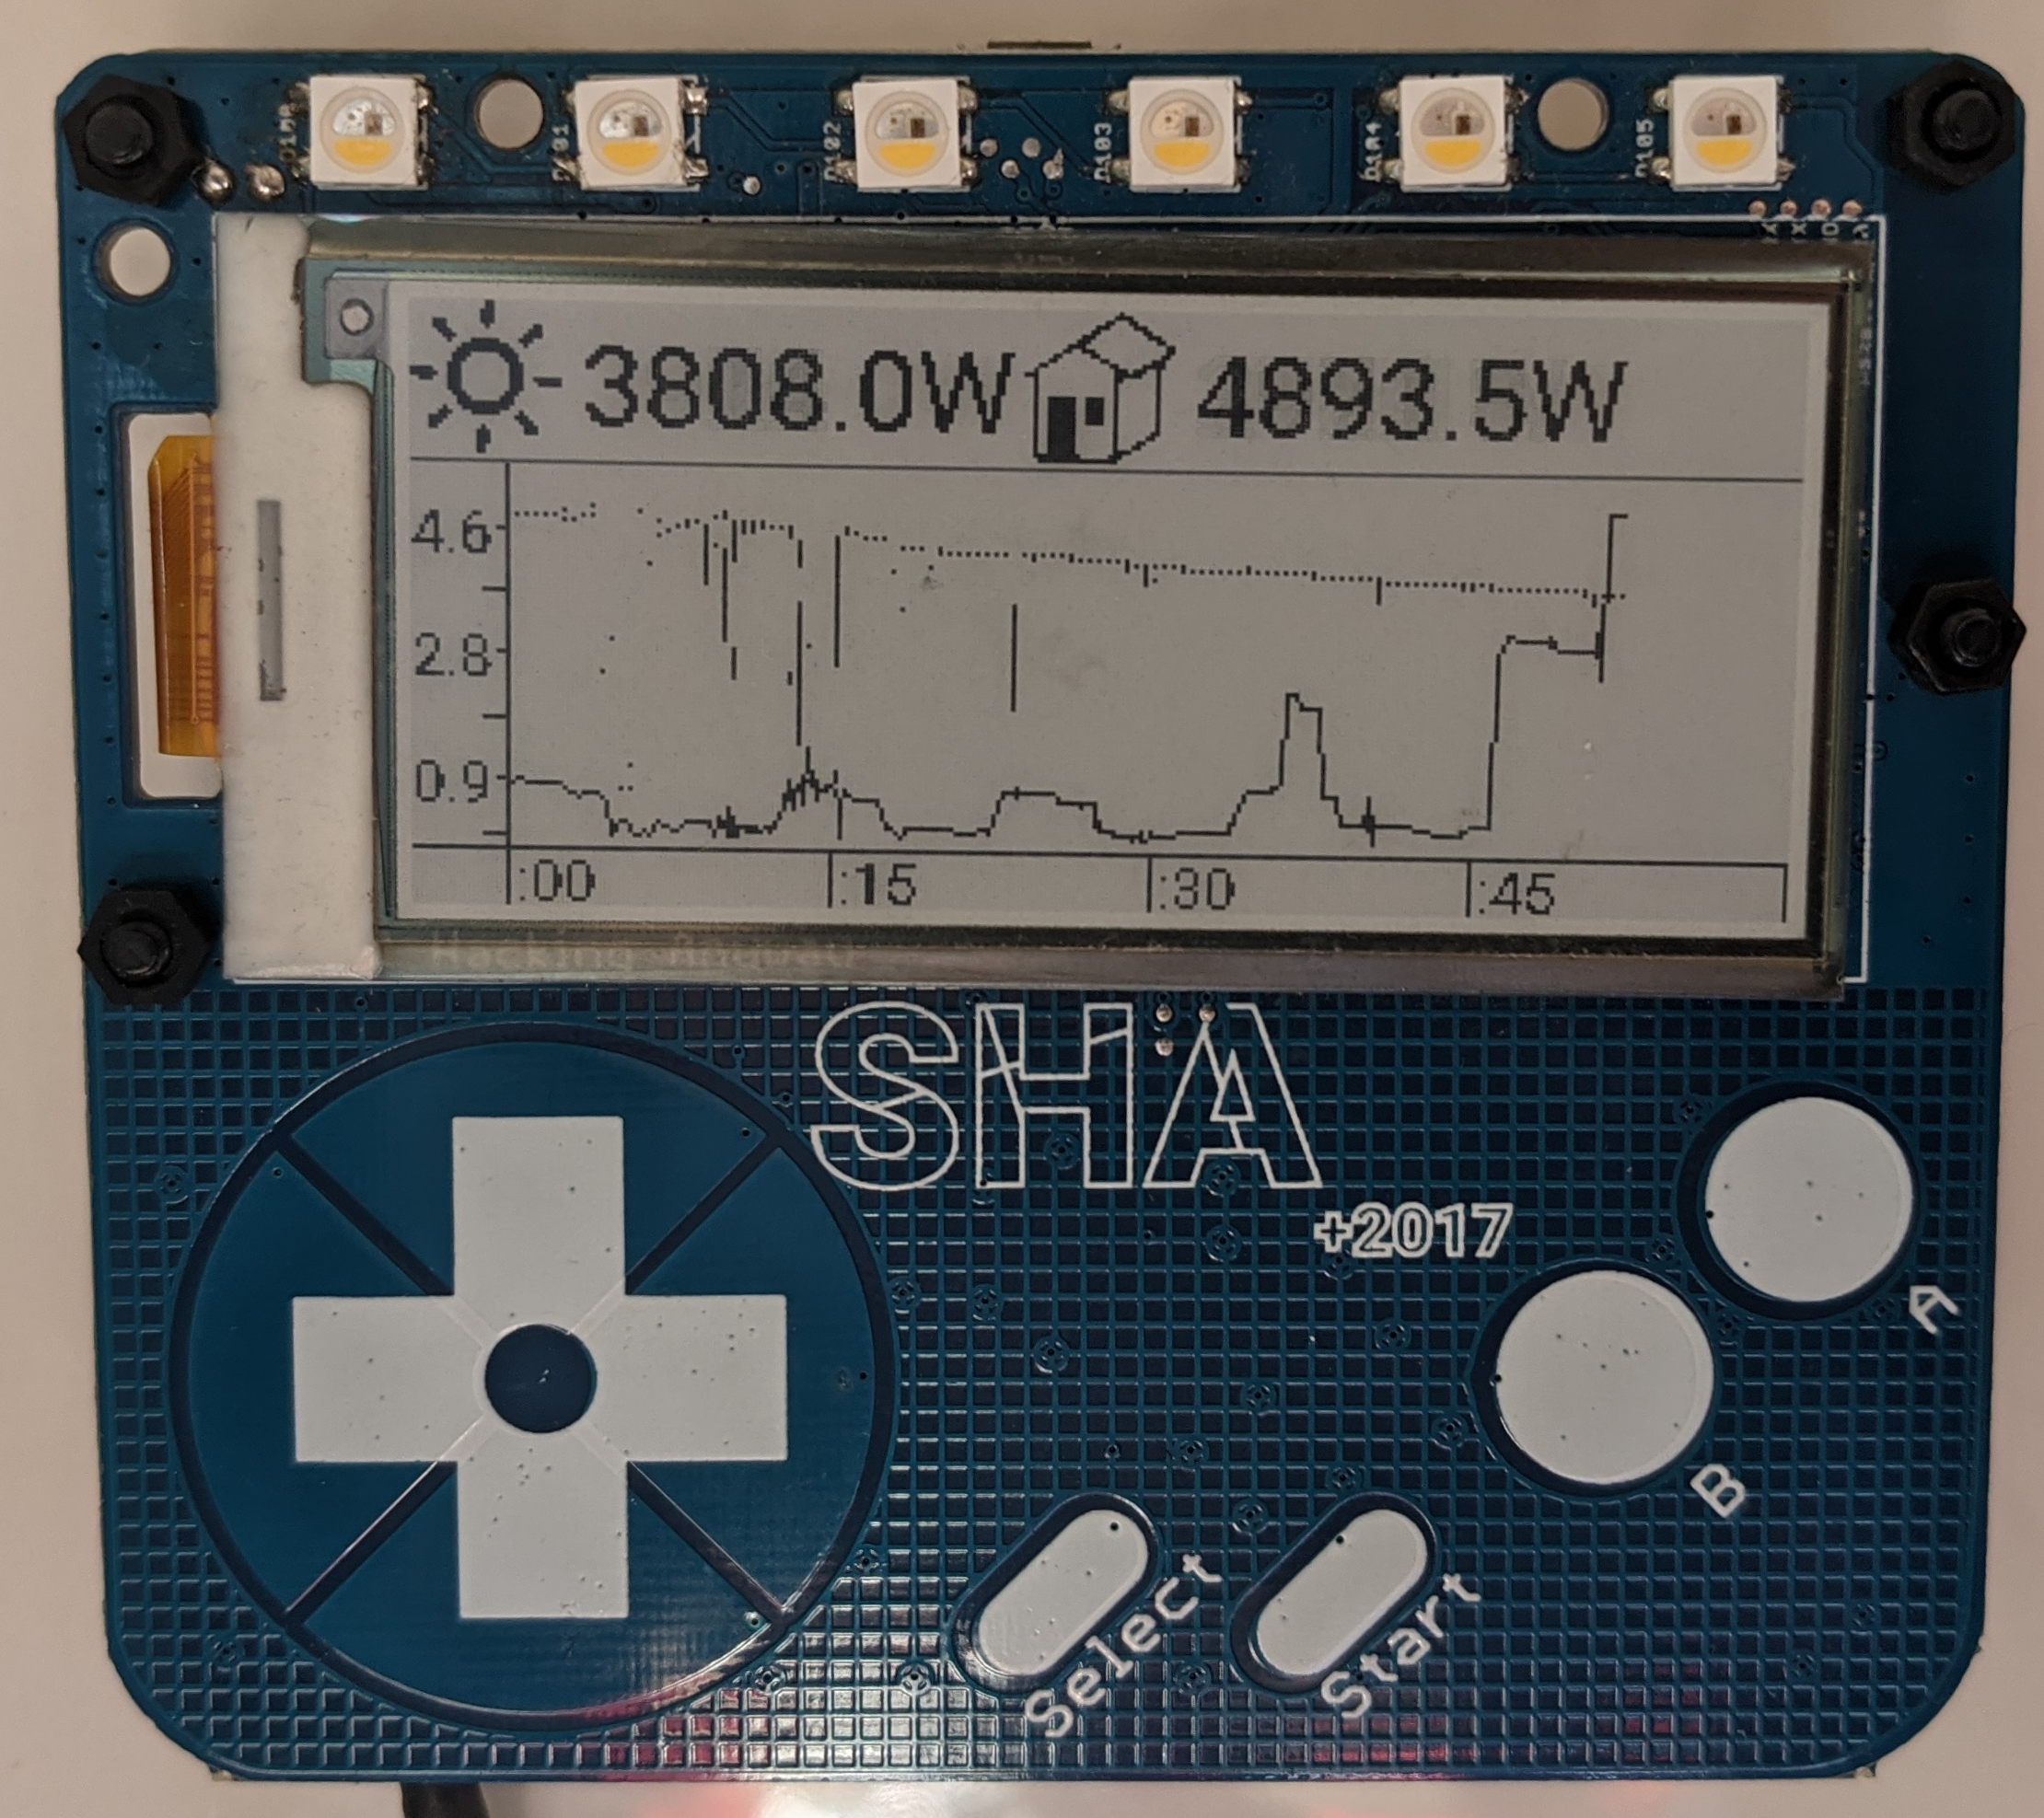
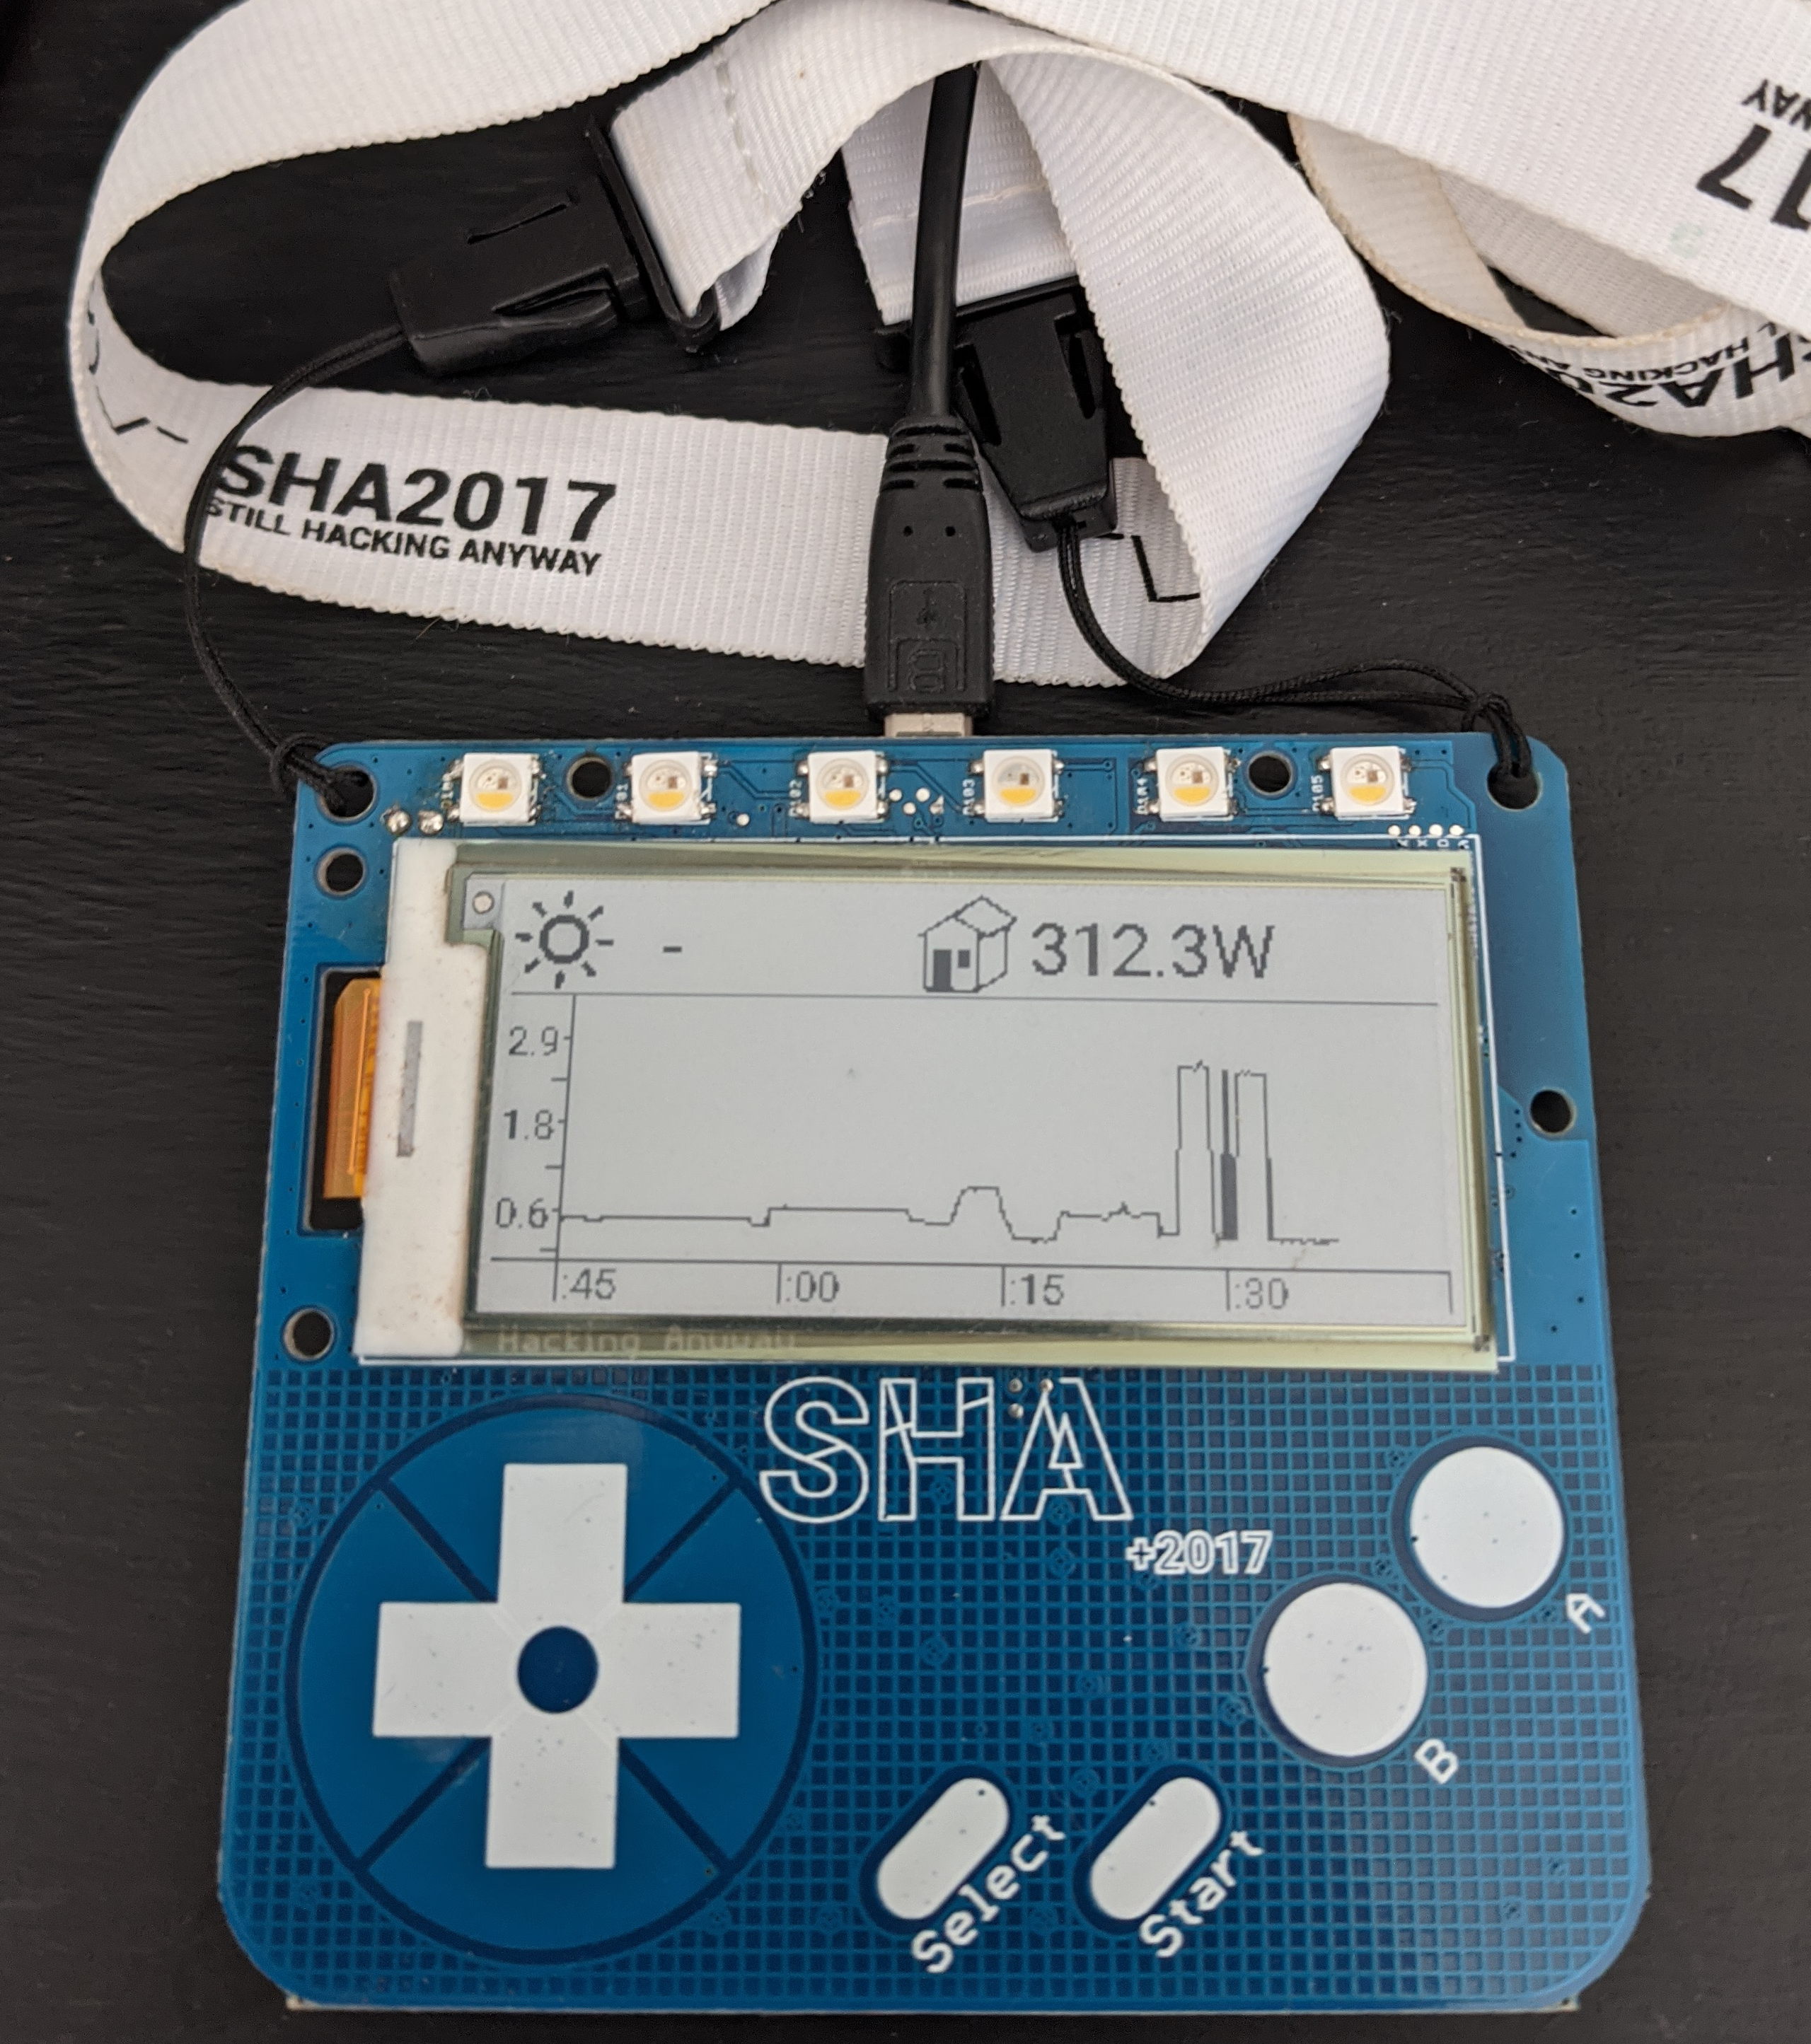
It's handy to be able to see at a glance what the solar system is doing, and how much power we are using:
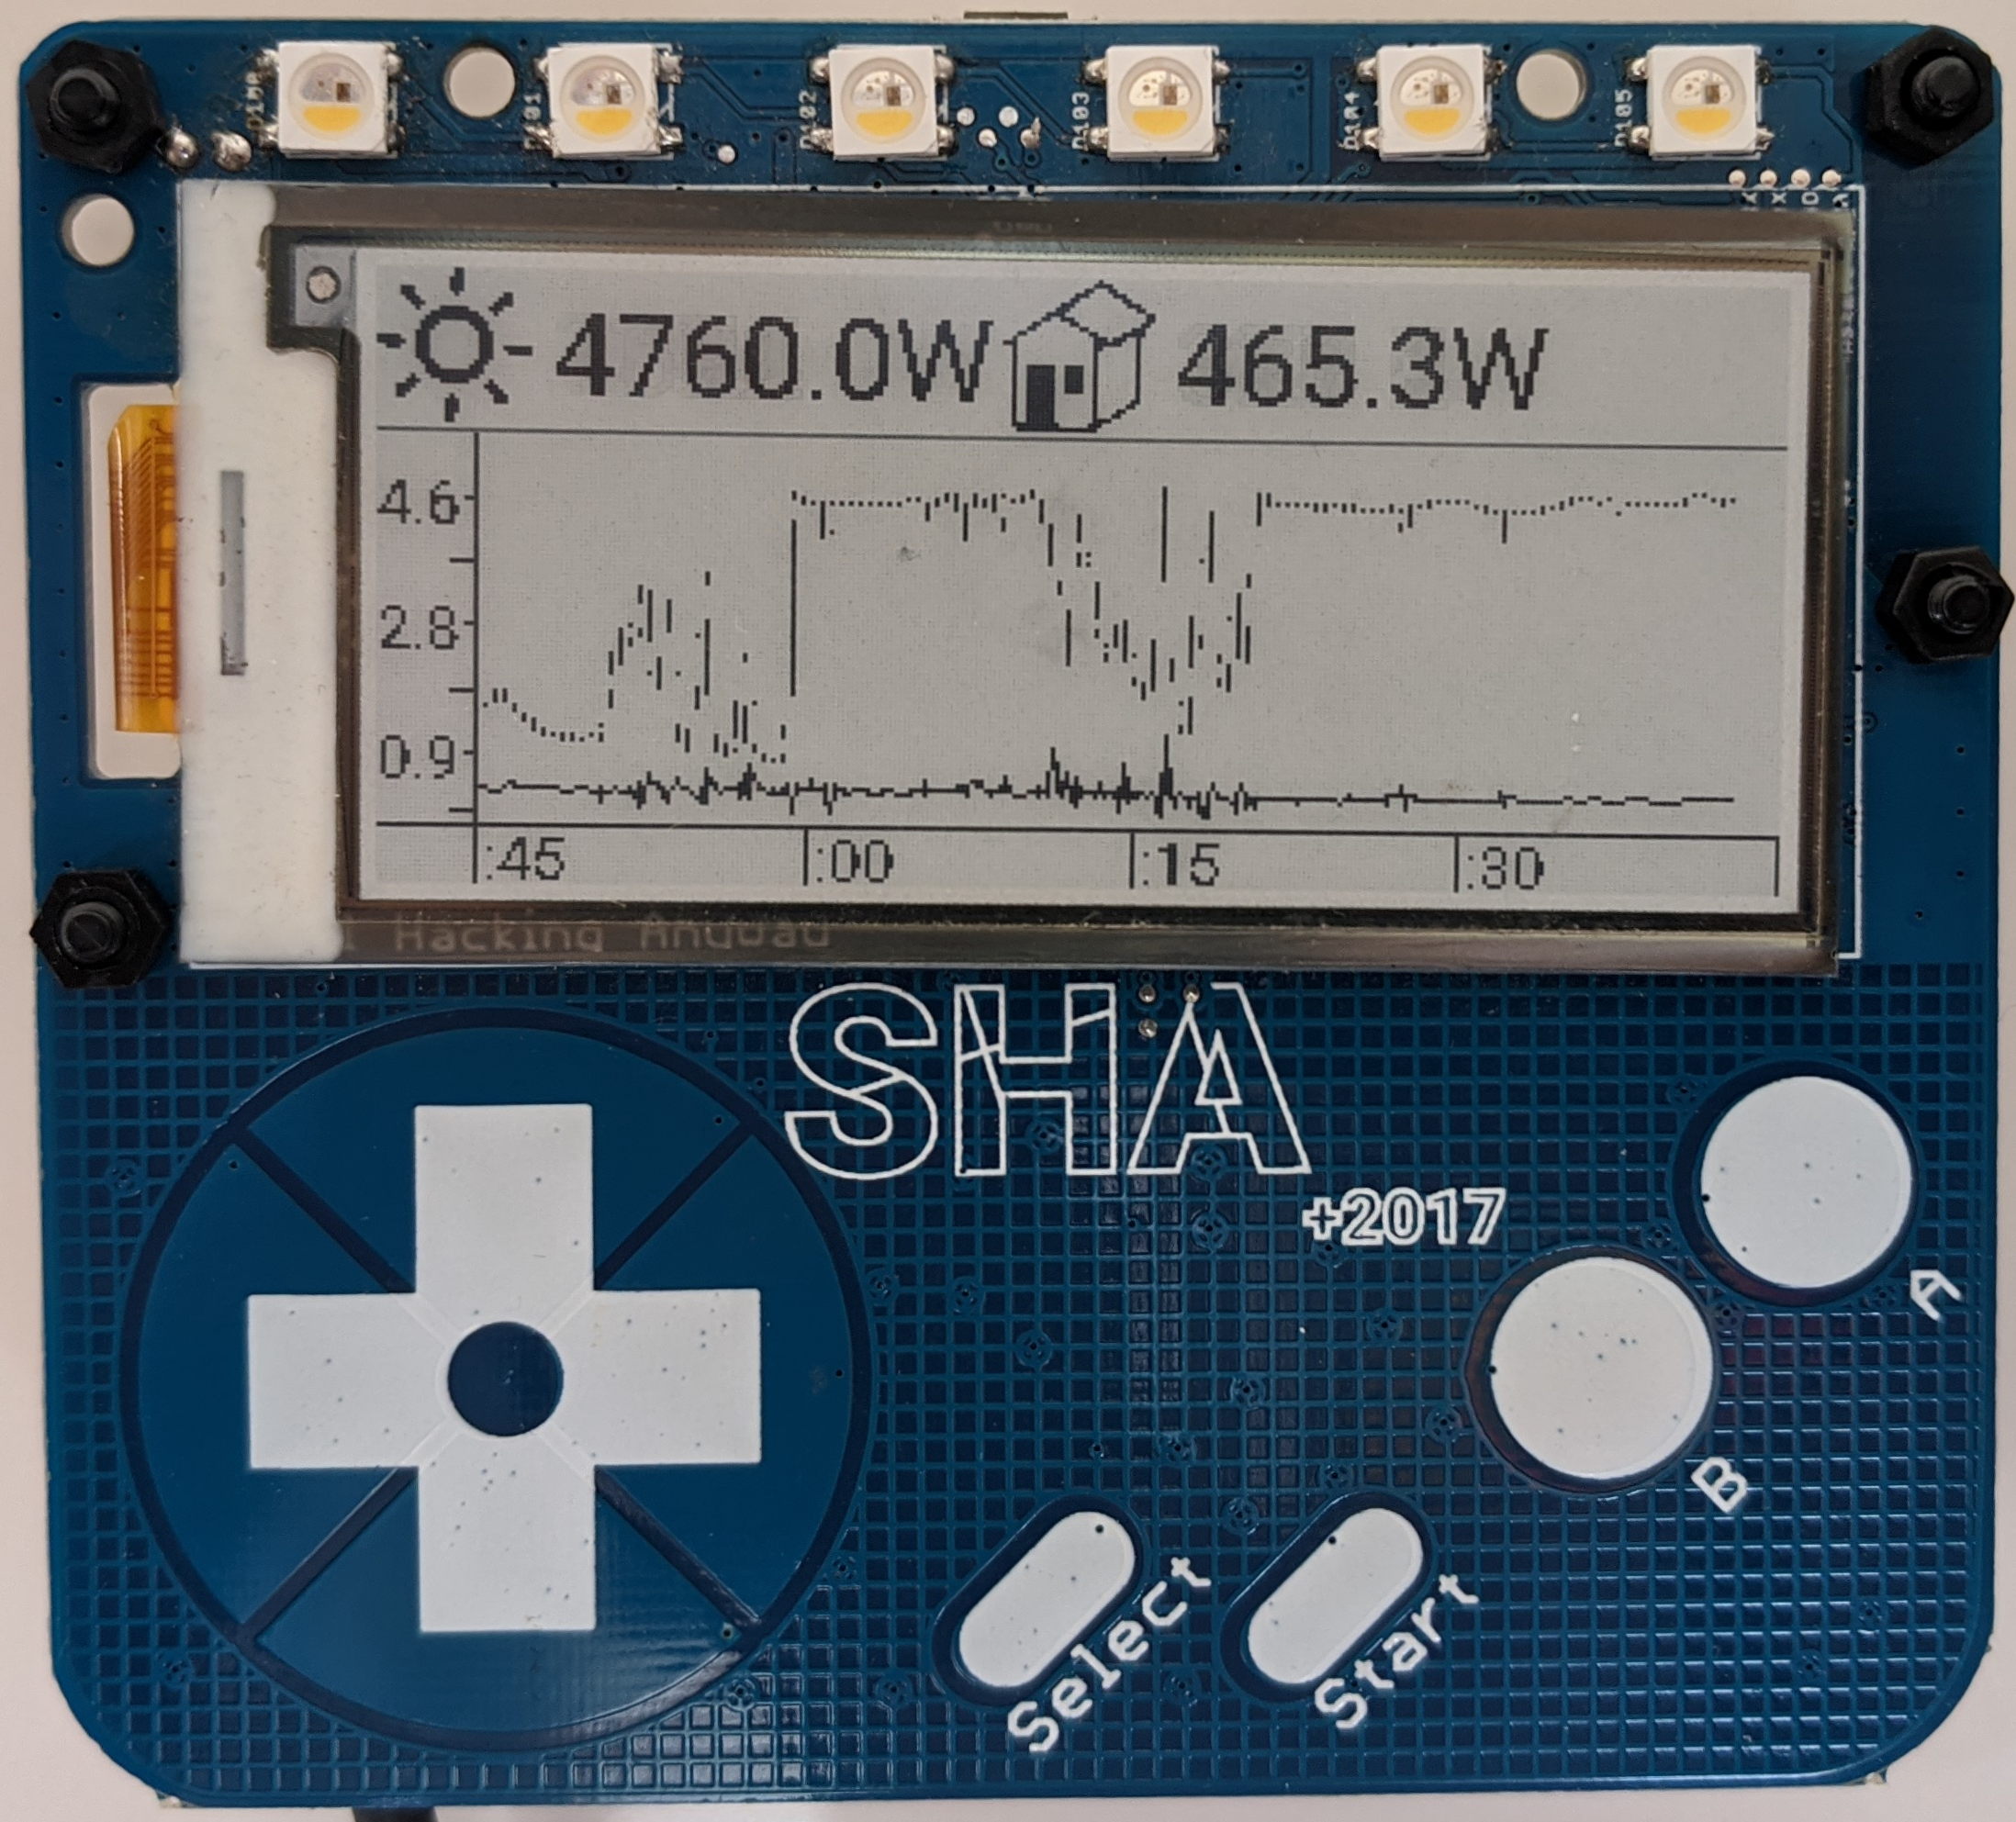
- The numbers at the top show the instantaneous solar output and the total power consumption of the house.
- The line graph shows the solar usage (dotted line) and the power usage (solid line) over the past hour. Every 15 minutes the graph scrolls one segment to the left.
- Only minutes are shown on the X axis legend because otherwise the firmware needs to know about timezones and daylight saving time...
It's also a lot of fun to have friends visit and say "do you have... a video game controller on your wall?"
Being able to put this together so easily is really due to the fantastic tools from MicroPython and badge.team. It's so much faster to start from a working execution environment and a working graphics display, rather than building everything up from first principles.
Because the solar usage monitor is so specific to our home's setup (at minimum, the InfluxDB schema has to match), I haven't shared it on the badge.team hatchery. I have put the code up on GitHub, in case anyone wants to crib from it - please excuse the naive coding style and the (still) lack of any InfluxDB credential support (eek!)
Future Plans
The next iteration of this project is to use the InkPlate 10 to display this information along with the weather station data and some other information, in a single attractive display. For now, however, the SHA2017 badge is doing a fantastic job!
(Interest Disclosure: For five years I worked for Espressif who make the ESP32 microcontroller used in both the SHA2017 badge and the InkPlate 10. However, this is entirely a personal project.)
Thoughts on “SHA2017 Badge solar usage monitor”